Quantcast
Channel: Preamplifier – Dagogo
Viewing all 46 articles
Browse latest View live

Spread Spectrum Technologies Thoebe II preamplifier and Son Of Ampzilla II stereo power amplifier Review

$
0
0

thoebe-soa2-CMYK

It is impossible to know from a name, or from how the founder of the company dresses for that matter, what a component will sound like. If one were to go by appearances only, the attire of James Bongiorno or the garish blue hue of his Ampzilla amplifier might be off-putting. James, now departed, was a vibrant individual who displayed that vibrancy in many ways. I recall seeing the Ampzilla at shows and I always wanted to review it, partly because of the sound it was making, and partly because of its looks!

It turned out the opportunity came to me when Constantine Soo, Publisher of Dagogo solicited the writers with the chance to review the components here presented. I was hesitant, though, and I will be honest about it; I noticed that Spread Spectrum Technologies, the company James Bongiorno started, was now in the hands of Wyred4Sound. I had sampled a Wyred4Sound amp previously in my room, but passed on it as a review candidate as it was not sufficiently enticing. I wondered if the mysterious Ampzilla II would capture my imagination beyond its name, so I took a chance on it.

It was a great move, as the Ampzilla II strikes my ear as radically different from the W4S amp I had used. I was pleased to see the thorough explanation contained on the “About” link at the SST homepage that EJ Sarmento, Wyred4Sound’s chief designer, is honoring the original design, retaining the larger schema but tweaking it, while toning down the blue color scheme to black. Thus far it seems the marriage of W4S and SST is working out.


Arrival and unpacking

The double boxed cartons with thick foam did the job protecting the Thoebe II and Son of Ampzilla II, and communication with Tony Holt of Wyred4Sound was timely and polite, a great customer service experience.

The components feature a flat, dull aluminum faceplate with matte gray cases. Gone is the vibrant, but somewhat off-putting garish blue color. The styling is understated, even generic along the lines of older NAD products. My first impression is of a subdued appearance, but thankfully without eyeball piercing LEDs. The stock feet are generously sized, so as to allow easy lifting, and the  weight is not prohibitive for most owners to handle alone.

These are the simple gear man’s delight, with throwback features such as BALANCE, BASS and TREBLE controls. I typically am disgruntled with contouring of the signal, but I found these controls deft and effective, liking the effect regardless of whatever potential degradation of the sound might occur from them being included.

The smallish remote looks better than most, but the nomenclature on the rear side of the components is far too small to be helpful. When a person has to peer over the side of a component at black lettering on a dark case using a flashlight, it is time to improve the experience.


Layout

The SST Thoebe II is a feature-rich preamp, having a collection of functions grouped in small touch buttons under a moderately sized display. Thankfully, bright green is used for the dimmable display, making it legible from a distance. To the left side of the display are two ¼” headphone outputs; the left one operates in conjunction with the speakers, but the right one mutes the Line function of the preamp while in use. To the far right is the VOLUME control knob. The other functions, duplicated on the adequately sized remote control, are from left to right STANDBY, INPUT UP or INPUT DOWN (Three pair unbalanced, one pair balanced), BASS, TREBLE, IR Sensor, BALANCE, PHASE, GAIN, DIM and MUTE.

The BASS and TREBLE controls adjust each from -5 to +5 in 1dB increments. Balance can be adjusted from +10L to +10R in 1dB increments. Phase is toggled between zero and 180 degrees, as is the Gain setting between High and Low.  The Phono stage requires an MM or high output MC cartridge, and it uses a new RIAA optimized topology. I only use file playback or streaming audio, so I will leave discussion of the Phono stage to others. The built-in DAC uses the ESS Sabre 9018 chip, has an Asynchronous, galvanically isolated USB input, and supports up to 32 bit 384kHz PCM and DSD4 and DSD128.

The backside of the unit is busy on the left side, with the optional Phono inputs above three sets of RCA inputs and one set of XLR. Fixed line level outputs occupy a black rectangle on the back plate alerting the owner to these potentially damaging outputs that are attenuated. A set of three RCA outputs and one set of XLR outputs follow. Above these are the Toslink, USB and Coaxial Inputs. Just off center of the back is a 12V Trigger output which when connected will turn on both the Thoebe II and Son of Ampzilla II. The 15A IEC sits off to the right with the power fuse compartment integral.


How about all those features?

In my room I have no need of balance control, as it is a perfect environment for listening. I did, however, test the Thoebe II’s BALANCE function and found it to shift the center image incrementally enough so as to allow for subtle manipulation. The indication of balance shifting is shown unusually by the display, but becomes intuitive quickly enough.

The BASS and TREBLE controls are the real stars of the user-friendly features of the Thoebe II. I found myself calling upon them whenever I set up a system with not quite enough top- or bottom-end. The value of an adjustable preamp with quality tonal controls can be enormous. If the audiophile does not wish to pursue adjustment of the system via cables, then the bass and treble controls are indispensable.

Any set of components and cables have an innate character, but when a new item is introduced into the system there is no telling precisely how and to what degree the sound quality will shift. One may be able to ball park the effect, but it may not be to full satisfaction. For instance, the Red Dragon S500 is a “cooler” sounding amplifier than the Son of Ampzilla II. If I were to construct the exact same system with the S500 I may deem the result too top-end emphasized. The Thoebe II’s treble control of only one or two steps down might bring a satisfactory lowering of the intensity on all music, not only particular tracks.

The BASS and TREBLE controls are readily available on the remote control, so I found that if a track was played with too heavy a bass footprint I could instantly lighten it; this is a very gratifying way to enjoy a piece of music at a higher level, but without the associated displeasure at the dynamic overload. Unlike tonal controls of the past, I found these to pose a very light burden on the signal, such that I did not mind the effect, and did not feel I was losing definition or detail for the sake of using it. This is one of the few tone controls I would use myself, and I did find myself taking advantage of it during the review without concerns for degradation of the sound. I like the combination of the cleanness of ESS Sabre chips in a DAC, yet having the configuration capacity of addressing any tonal issues.

The post Spread Spectrum Technologies Thoebe II preamplifier and Son Of Ampzilla II stereo power amplifier Review appeared first on Dagogo.


First Watt B1 Buffer Preamp and J2 Power JFET Amplifier Review

$
0
0

I wonder how many audiophiles get caught on the “power escalator,” by which I do not mean the one at the mall, but the one in the listening room. Did you know you have an escalator in your audio room? Sure you do, if you have over time found yourself seeking an ever more powerful amp which you believe will yield better sound. I admit I have a very tall, long escalator in my room, one that extends back ten years and reaches 1,000 Watts high! I rode that escalator many times between the 200-Watt and 1,000-Watt floors, but it has been several years since I rode it down to the basement, the sub-100-Watt floor. With the review of the First Watt J2 JFET Amplifier and B1 Buffer Amp, it is time to descend.

It seems most audiophiles enter the hobby already well upward from the bottom steps of power by using either a receiver with at least 100Wpc or separates at the same, or higher, specification. It did not take me long to settle on enjoyment of big power. Among several others, I have reviewed two powerful amps from Pass Labs, the Class A XA160.5, and the Class A/B X600.5. I must admit that for all the beauty of the XA160.5 I felt drawn to the X600.5 for the vastness of the soundstage, the macrodynamic impact and utter ease at higher listening levels. I concluded I could capture the finesse the XA160.5 displayed through manipulating other aspects of the system such as the DAC or cables. However, the attributes provided by the power structure of the X600.5 seemed impossible to duplicate with the lower-powered amp.

I have spent a fair bit of time, too, with Class D amps offering from 200 to 1,000Wpc, another flavor of big sound. To date, the Red Dragon S500 is my Class D amp of choice, and it has been a particularly peachy performer with sultry sound in many systems. Given these experiences, what could possibly enthrall about a (relatively) puny “25 Watter” by First Watt? That is what I seek to explain in this article, along with my impressions of the difference between big power and relatively low power, and the practical implications for someone going the lower-power route.

First Watt B1 Buffered Preamp

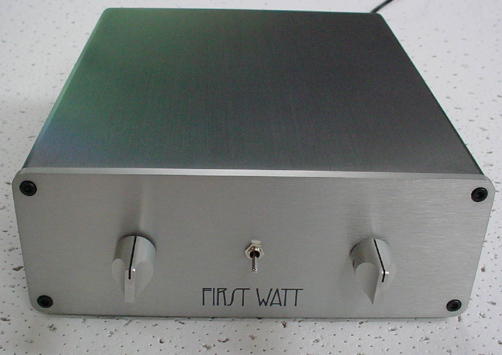
The B1 Buffer Preamp is described by First Watt as a minimalist line stage for controlling listening levels without editorializing on the source signal. It is a small, lightweight but well built, pressed all-aluminum box featuring a center toggle switch on the faceplate to select between two pair of RCA inputs, and twin attenuation controls for Left and Right channels. On the backside, the unit is powered by a supplied DC power cord; the unit remains powered up when plugged in, as there is no On/Off switch.  Along with the two sets of single-ended inputs is a pair of single-ended outputs. That’s it – no muss, no fuss!

The purpose of the B1 Buffer is to address impedance mismatches between a volume control and an amp. Nelson Pass explains in the Owner’s Manual:

“Is impedance matching an issue? Passive volume controls do have to make a trade-off between input impedance and output impedance. If the input impedance is high, making the input to the volume control easy for the source to drive, then the output impedance is also high, possibly creating difficulty with the input impedance of the power amplifier. And vice versa: If your amplifier prefers low source impedance, then your signal source might have to look at low impedance in the volume control.

This suggests the possibility of using a high quality buffer in conjunction with a volume control. A buffer is still an active circuit using tubes or transistors, but it has no voltage gain – it only interposes itself to make a low impedance into a high impedance, or vice versa.

If you put a buffer in front of a volume control, the control’s low impedance looks like high impedance. If you put a buffer after a volume control, it makes the output impedance much lower. You can put buffers before and after a volume control if you want.

The goal for the First Watt B1 was to make a solid state buffer that was very neutral, with very low distortion and noise, and very wide bandwidth without using negative feedback. It has no voltage gain; its sole purpose is to either increase or lower impedance.”


With First Watt, you don’t just get a component, you get a Nelson Pass commentary and tutorial all in one. The B1 and J2 Owner’s Manuals read more like shoptalk to designers than directions for owners. Nelson attempts to make it lively by inserting analogies to explain the effect of gain in a system, such as driving a car at 55mph in a vehicle where the engine is barely working versus a car in which the engine is running at top speed. Vehicle analogies come in handy when discussing audio systems, and I can relate to this one. Having used everything from SET amps to high-power Class D, my ears have heard the sonic equivalent of what Nelson is saying. His assertion is that with the proper speakers the lower-powered amp can be every bit as stimulating to the hearer as the higher-powered.

Staying with the automotive analogy, the question I will seek to answer is; does one obtain the full driving experience with lower power? Or, similar to a four cylinder car, does one hear a “strain” or lack of torque, so to speak, with a lower-powered amp? Conversely, does a higher-powered amp always ensure more ease, or shall we say, “sound performance”? The two camps, low power and high power, often do not compare directly technically as the technologies can be quite different – consider a SET amp versus a Class D amp. Yet, assuming there is no mismatch of the amp to speaker, the listening experience is the acid test for the hobbyist, and is the focus of this article.

The post First Watt B1 Buffer Preamp and J2 Power JFET Amplifier Review appeared first on Dagogo.

Emia Remote Autoformer Review

$
0
0

What if I told you the best linestage I have ever heard in my system wasn’t the $28,000 tube preamp I loved for so long or the incredible $38,000 transistor unit that I recently had in the house” If you have to have an active linestage, these two units are the best I have heard. If you can get by with a passive unit that is so plain looking that it’s almost invisible, then I can tell you the best linestage I have ever had in the house is the silver version of Emia Remote Autoformer. Truth is it’s not even close in my system.

Jeffrey Jackson and Dave Slagle created EMIA to fulfill the need for affordable high-end audio components using clever design and quality parts. On the Emia website it says, “Emia represents a way of thinking or a concept if you will, rather than a specific product. Our unique way of thinking blends the knowledge and experience of Jackson of Experience Music and Slagle of Intact Audio with the goal of integrating the subjective and the objective to further both the art and science of musical reproduction. While so many people today are simply trying to copy and bring a vintage technology to market, we strive to understand the underlying concepts and apply them to contemporary sound reproduction through the introduction of new designs.”

Jeffrey and Dave have chosen to use unassuming chassis design that puts the bling on the inside as Dave Slagle is fond of saying. Everything they make is hand-made in their workshops. Emia is not even close to being a mainstream high-end audio company. You have to place an order and most often wait for the product, but I promise you it is worth the wait.


Design

According to David, Emia’s goal in circuit design is to think outside the box and look at everything from vintage Western Electric parts to modern circuit boards. One of their primary design principles is their belief in using the best part for the job, and that they say, they couldn’t care less if that part is vintage, modern, inexpensive or expensive.

The Remote Autoformer provides control from +7dB to -53dB in 1 dB steps. You also get something I will no longer live without, the ability to balance the system between the left and right channels in 1 dB increments. It has three inputs and two outputs.

In a conversation with me, David jokingly said resistive attenuators were “so last century.” He feels that real systems use inductive volume controls and points out that they were good enough for Western Electric, and they are still the best. He maintains that he uses an inductive volume control that measures really well, is easy to install, and provides sufficiently fine volume steps. He said, “It makes much more technical sense to use an auto transformer for this application. Since there’s no need to isolate the primary and secondary windings, and both windings may be grounded, it is perfectly fine to combine the primary and secondary into a single winding. That’s exactly what McIntosh has been doing for decades with their output transformer based solid-state amplifiers.

When I asked him how the Emia units are different from other autoformers he has made before, he answered, “All of the autoformers I make have essentially the same character. The only thing that differs between them is the attenuation taper and switching methodology. This unit uses higher quality relays and a processor to accomplish a switching arrangement that provides -54dB to 0dB in 1dB steps. Beyond 0dB the unit seamless transitions to up to an additional +7dB of gain also in 1dB steps. The unit also allows remote input selection between the three inputs. Balance control is also done by remote in 1dB increments by automatically bumping one channel up or down by one step at a time, so no additional circuit is required.”

He then added, “To me, the two biggest features of this unit is the ability for remote balance control and the transition to gain only when needed. Other units allow a single 6dB switch that changes the entire character of the sound.” Speaking for myself, I find balance control a necessary function in order to get the ultimate enjoyment out of my system. So, I agree that the ability to fine tune the balance is really nice.

The post Emia Remote Autoformer Review appeared first on Dagogo.

Esoteric Grandioso C1 Line Stage Preamplifier and Grandioso M1 monoblocks Review

$
0
0

Emotion in a Silver Jewel Box

Many months ago I was asked about reviewing the Esoteric Grandioso C1 preamp and M1 monoblocks. I had just started to remodel my home, including the listening room, so the review had to wait. I was about 3 weeks away from being done with the project when Scott Sefton of Esoteric contacted me about bringing the pre and amps over to my home. As it turned out, there were some remodel items that still needed a few more weeks to finish (and, of course, months of additional tweaking), most notably redoing the electrical outlets. Nonetheless, I determined that I was ready to start doing reviews again.

A preliminary word about this review. When I finally completed the first draft it was two and one-half times longer than it is in this final version. As you will see, I liked these components so much that I found myself stretching to find something wrong with them. I literally wrote a page on whether they sounded great because they did something “wrong” in the musical reproduction. I finally realized that the added verbiage created the misleading impression that there was something about these wonderful products that I didn’t like, so in the end I took it all out. So don’t be deceived by the shortness of this review. I and others spent many hours debating where the C1 and M1 fit in the pantheon of top-tier audio components.


Esoteric Is The Right Word

I’ve been very familiar with Esoteric’s digital products, having owned several in the past. However, I wasn’t sure what to expect from their preamps and amps, other than what I’ve heard at audio shows. I guess I expected something very detailed and nuanced, and just a shade on the analytical side. Boy was I wrong. Yes, what I received was highly detailed and nuanced, but there is no way you can apply the “analytical” label to the C1 or the M1.

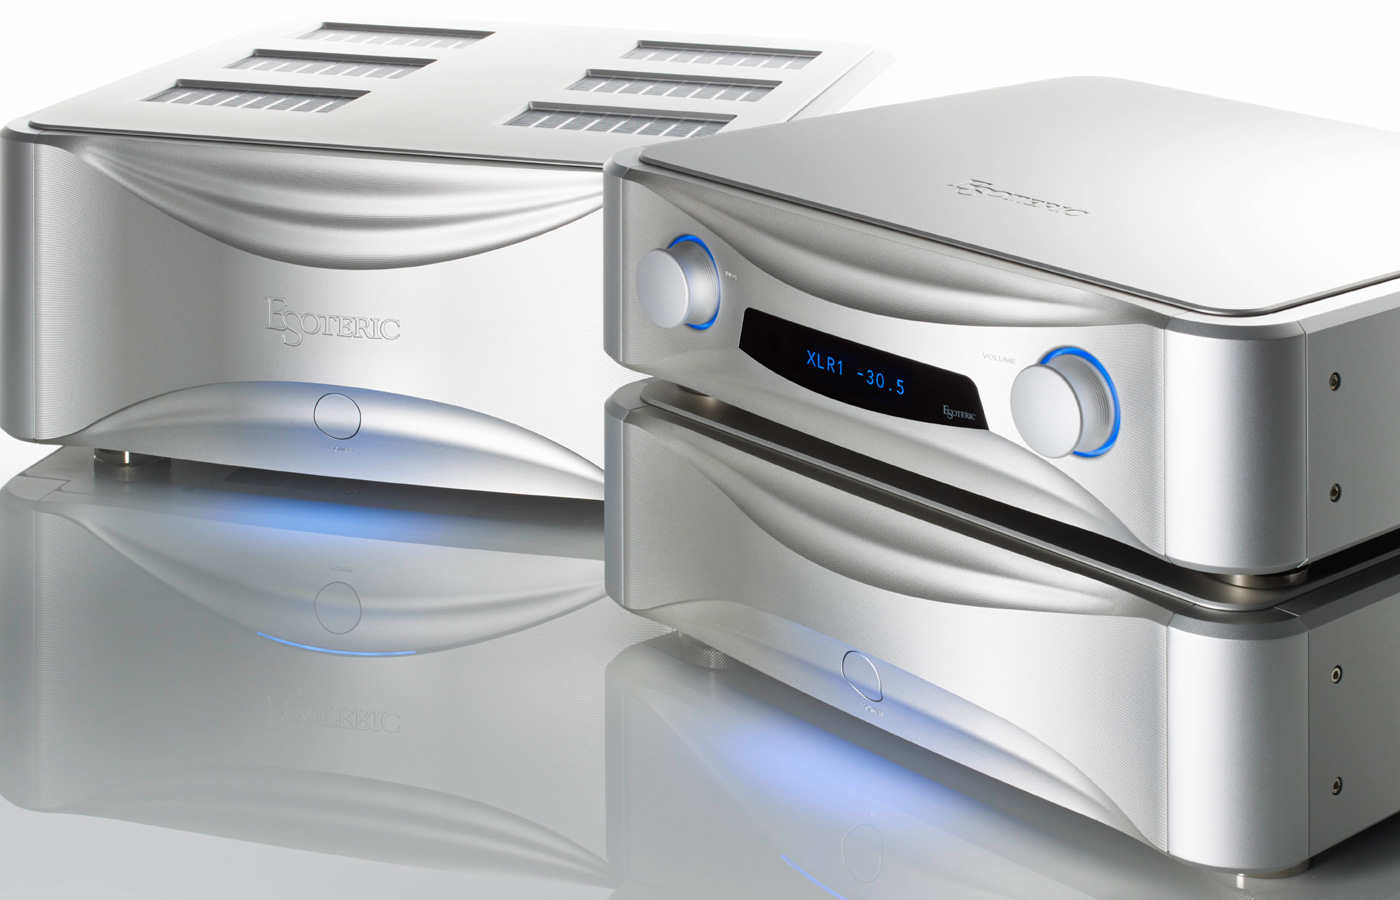
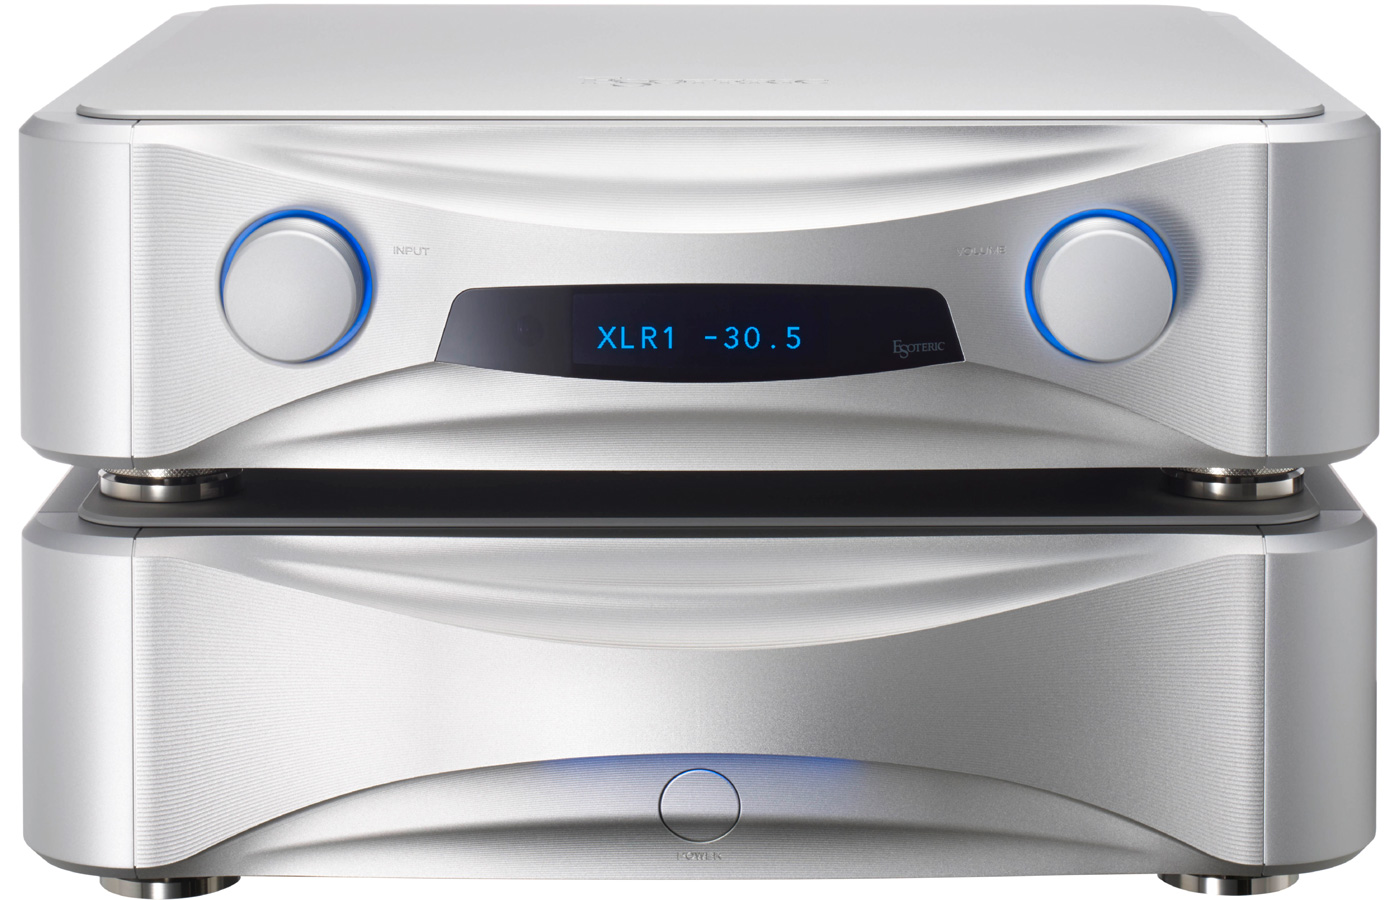
The C1 and M1 are big, heavy and strikingly beautiful. Of course, beauty is in the eye of the beholder, but I suspect that 95%+ of the audiophile population will agree that these components fall into the beautiful category. You will definitely want to display them, as they absolutely beg to be shown off. In addition, their weight and construction are such that aftermarket feet/points are unnecessary. Though I positioned the C1 on a heavy and solid equipment rack and the M1’s on heavy amp stands, I suspect I could have placed them on the floor or on a lesser rack and still gotten excellent results.

Esoteric Grandioso C1 Line Stage Preamplifier

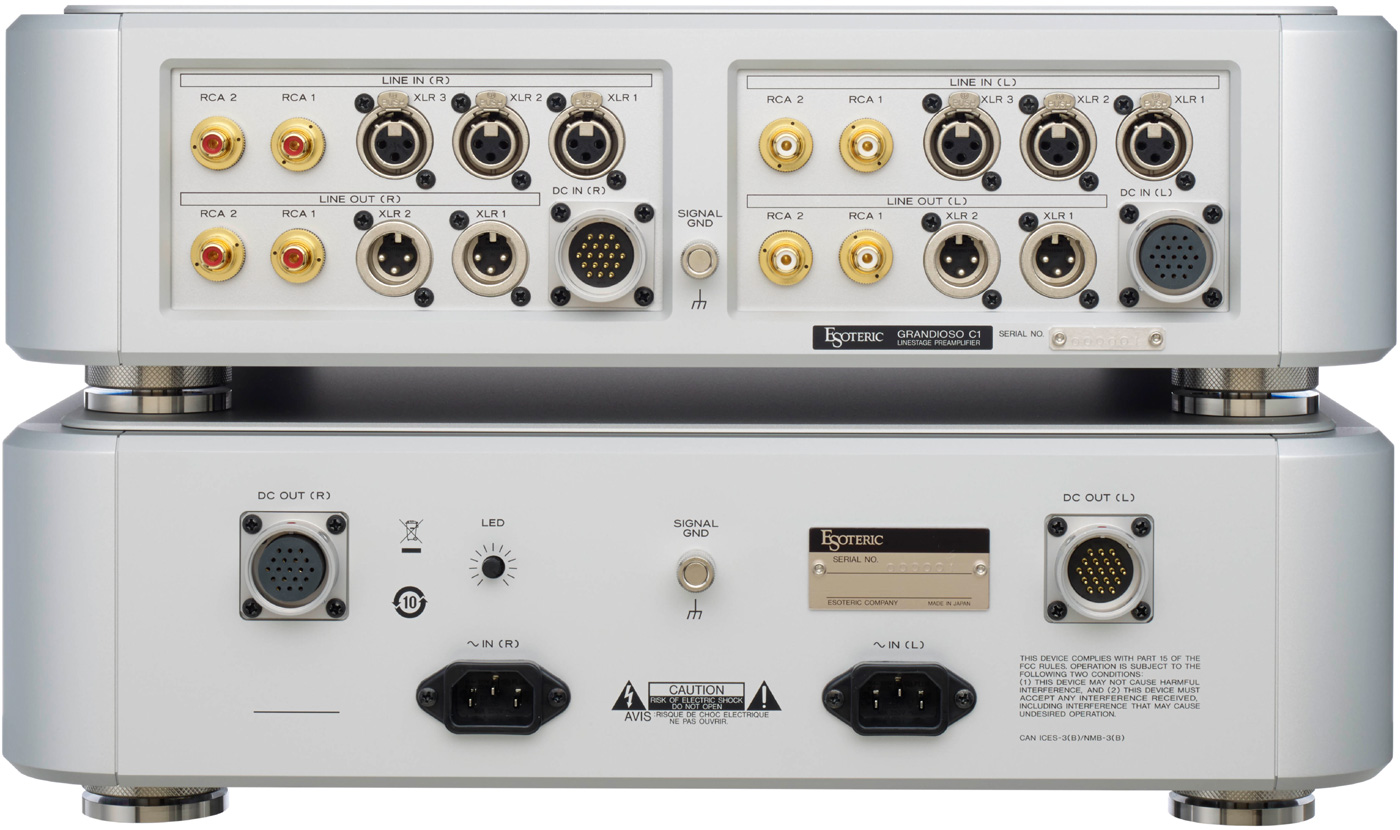
The setup was straightforward, with the only unusual aspect being the fact that the C1, which is a two-piece preamp, consists of a DC power supply and a separate control unit. The preamp’s DC power supply is a true dual-mono device, but in a single enclosure that requires two separate power cords to feed dual AC inputs that in turn translate into DC outputs that feed the C1 control unit via two multi-pin umbilical cords. For those of you interested, the C1 DC power unit uses five hefty power transformers and features high-capacity reservoir capacitors and silicon carbide (SiC) Schottky barrier diodes.

Quoting from Esoteric’s website, the control unit “consists of two monoblock preamplifier modules and a logic control module. The input and output sections of each preamplifier module are constructed on separate boards, which are arranged one above the other in order to minimize the lengths of the signal paths. These modules are mounted on a unique leaf spring suspension system that was originally developed for Esoteric’s leading lineup of SACD players. Its floating design helps achieve total left and right channel independence.”

The M1 monoblocks are the proverbial iron fist in a silk glove, with 300 watts into 8 ohms, 600 into 4 ohms, and a serious maximum power output of 1200 watts into 2 ohms. They have 28dB of gain, and accommodate both XLR and RCA connectors.

The functions and controls of the C1 are intuitive and are a pleasure to operate, so there is no reason to spend any time here explaining their operation. Suffice it to say that everything works as expected without even the hint of a hiccup.

I did have an initial glitch with the C1/M1 combo. I discovered that the M1s are sensitive to DC offset, which is a new issue I experienced after my recent home remodeling. This is not the place for a full discussion of DC offset (in my case apparently caused by the wall switches installed as part of a new LED lighting system), but it can cause transformers to develop a mechanical hum, and high-power amps generally have big transformers. Some amps are more susceptible than others, and the M1 appears to be susceptible. However, I was easily able to address this issue with a great product – the Emotiva CMX-2 Precision AC Line Restoration & Common Mode Filter System. This product is very good, not very expensive, and does exactly what it says. It probably deserves its own review, and perhaps I’ll do that in the coming months. Suffice it to say that this product completely eliminated the issue, so I was able to proceed with the review without any transformer hum.

Initial Configuration

I first tested the C1/M1 combo in the following configuration: My Qsonix Q-205 server’s digital output fed a Legacy Audio Wavelet via a Stealth Audio V14-T digital cable (see my review in September 2016). The Wavelet’s analog outputs fed the Esoteric Grandioso C1 via a balanced Stealth Sakra V12, and the C1 connected to the M1’s via balanced Wireworld Platinum Eclipse 6’s. Speaker cables were Silent Source Silver Signature, and the speakers were Vivid Audio Giya G1.

For those of you unfamiliar, the Wavelet is a custom piece developed by Legacy Audio initially for its fabulous V speakers. It is a DAC, crossover, room correction and digital preamp in a single box. A review of this amazing component will follow, but you need to know that the Wavelet can be used in various ways, and I used it here as a DAC in all cases, but also with the room correction on and off, and incorporating or bypassing the digital preamp. In my initial configuration the Wavelet was used as a DAC and room correction device, with the C1 doing the preamp duties.

The post Esoteric Grandioso C1 Line Stage Preamplifier and Grandioso M1 monoblocks Review appeared first on Dagogo.

Audio Note M10 Signature Preamplifier Review

$
0
0

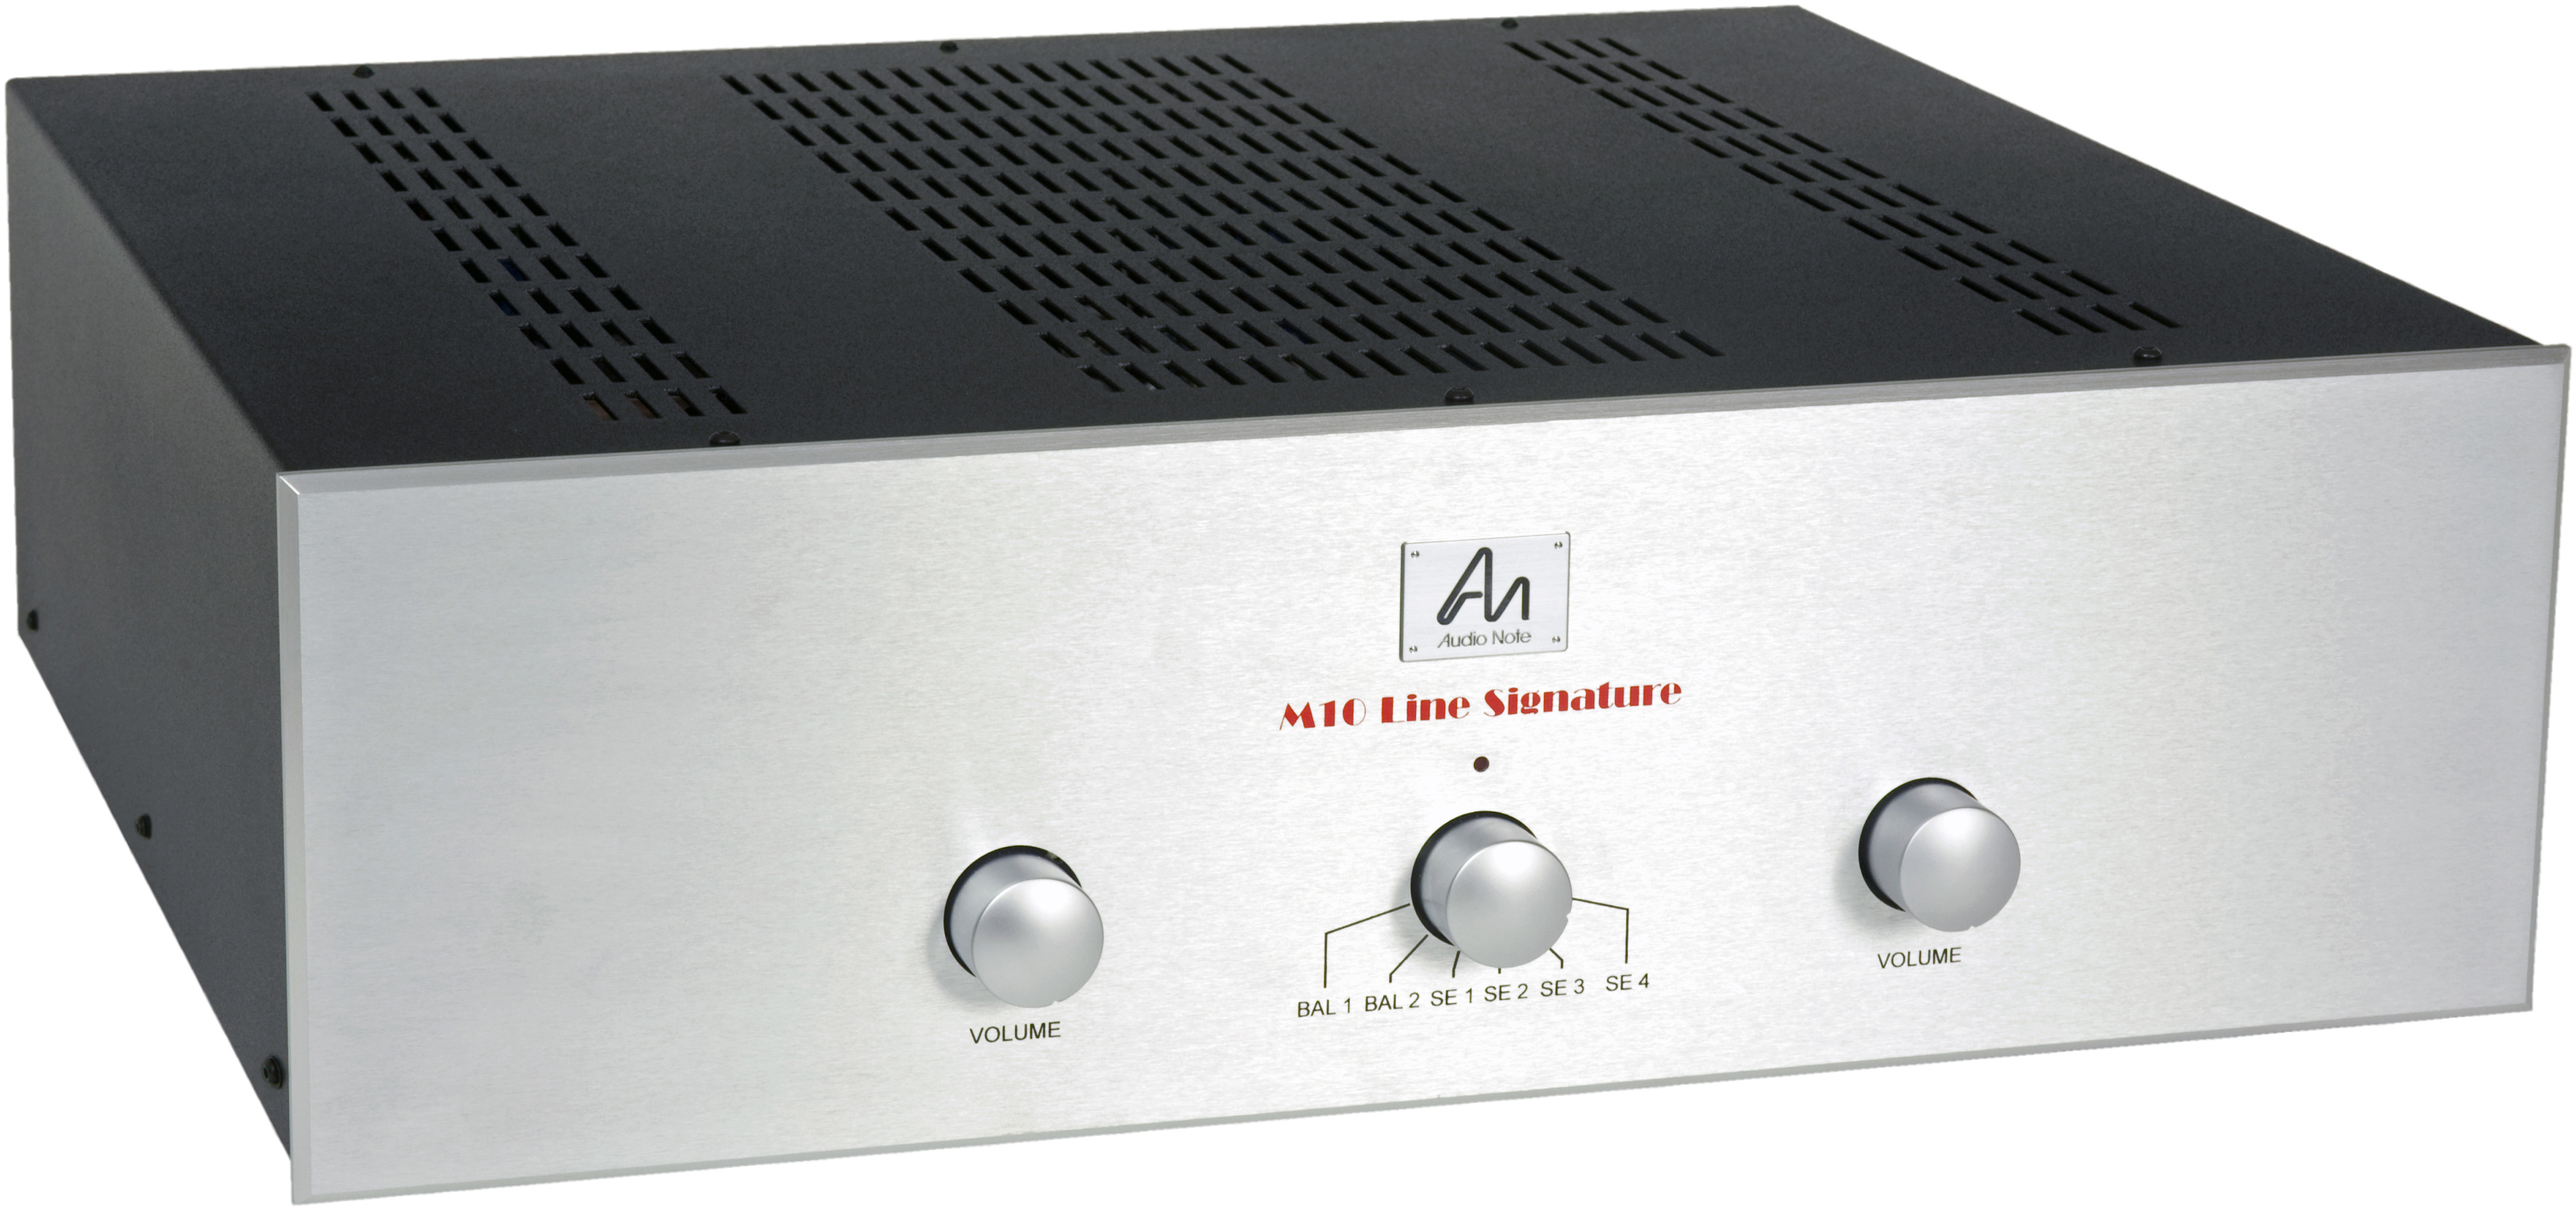
Audio Note M10 main chassis

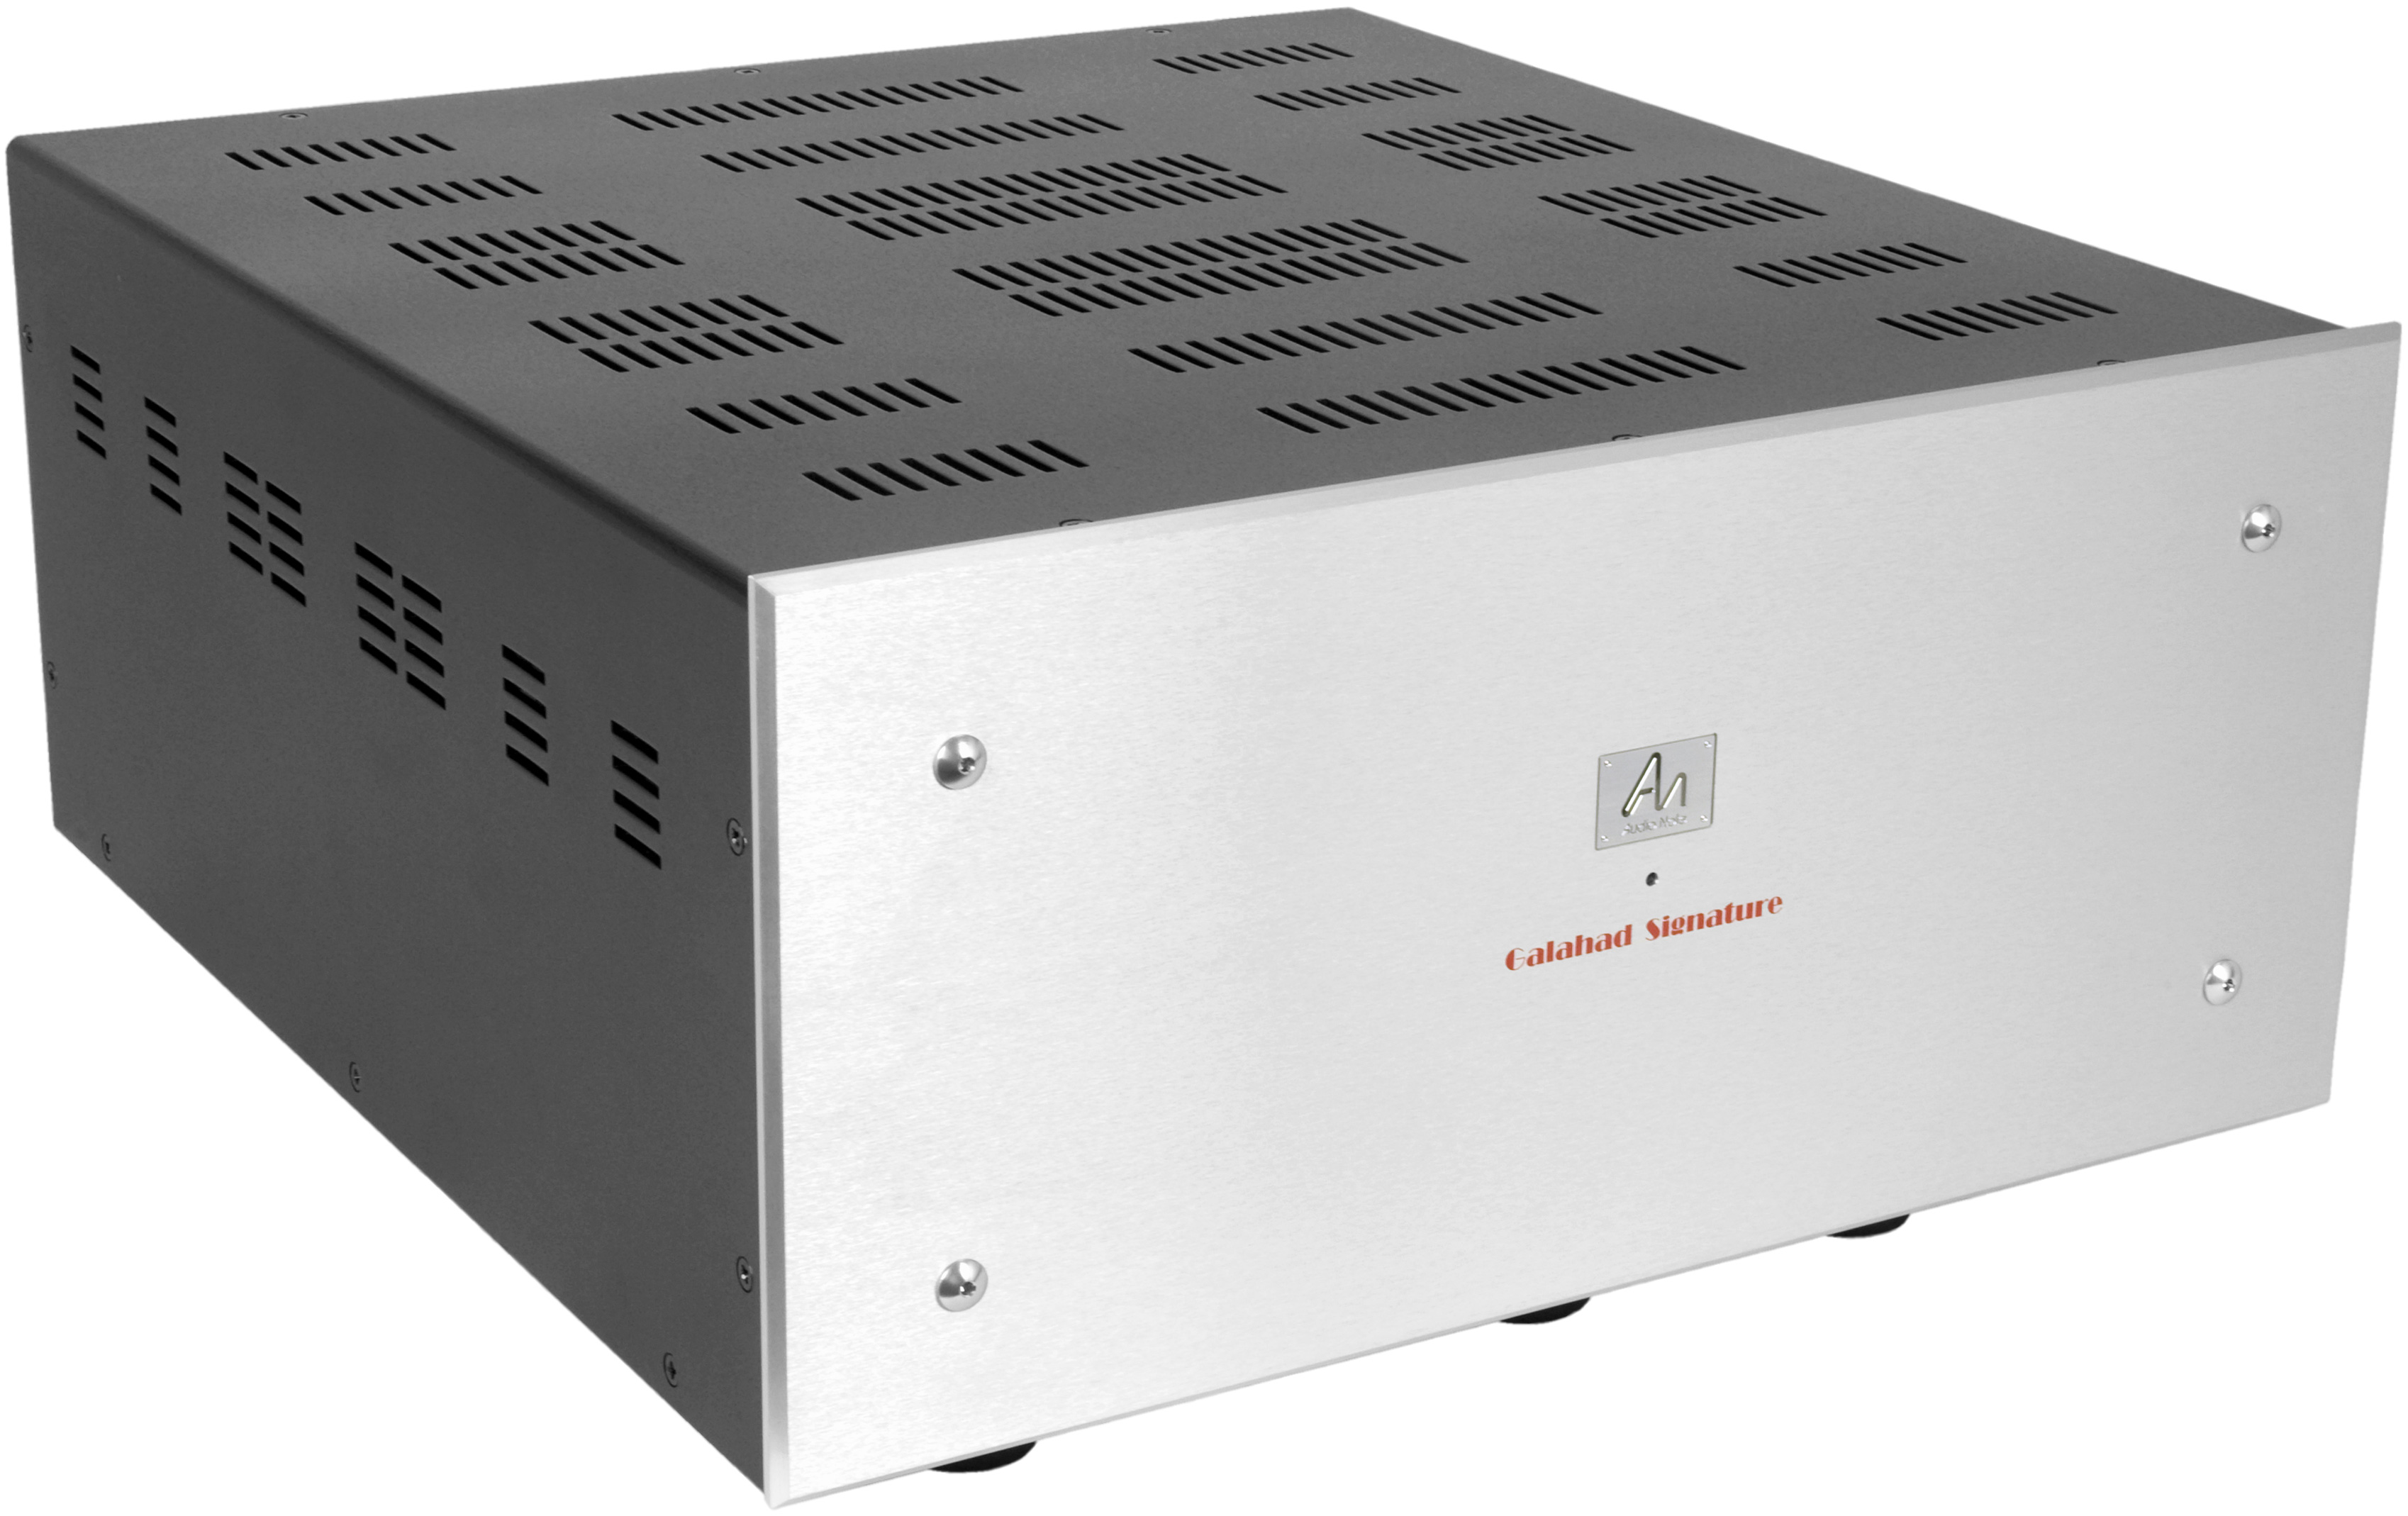
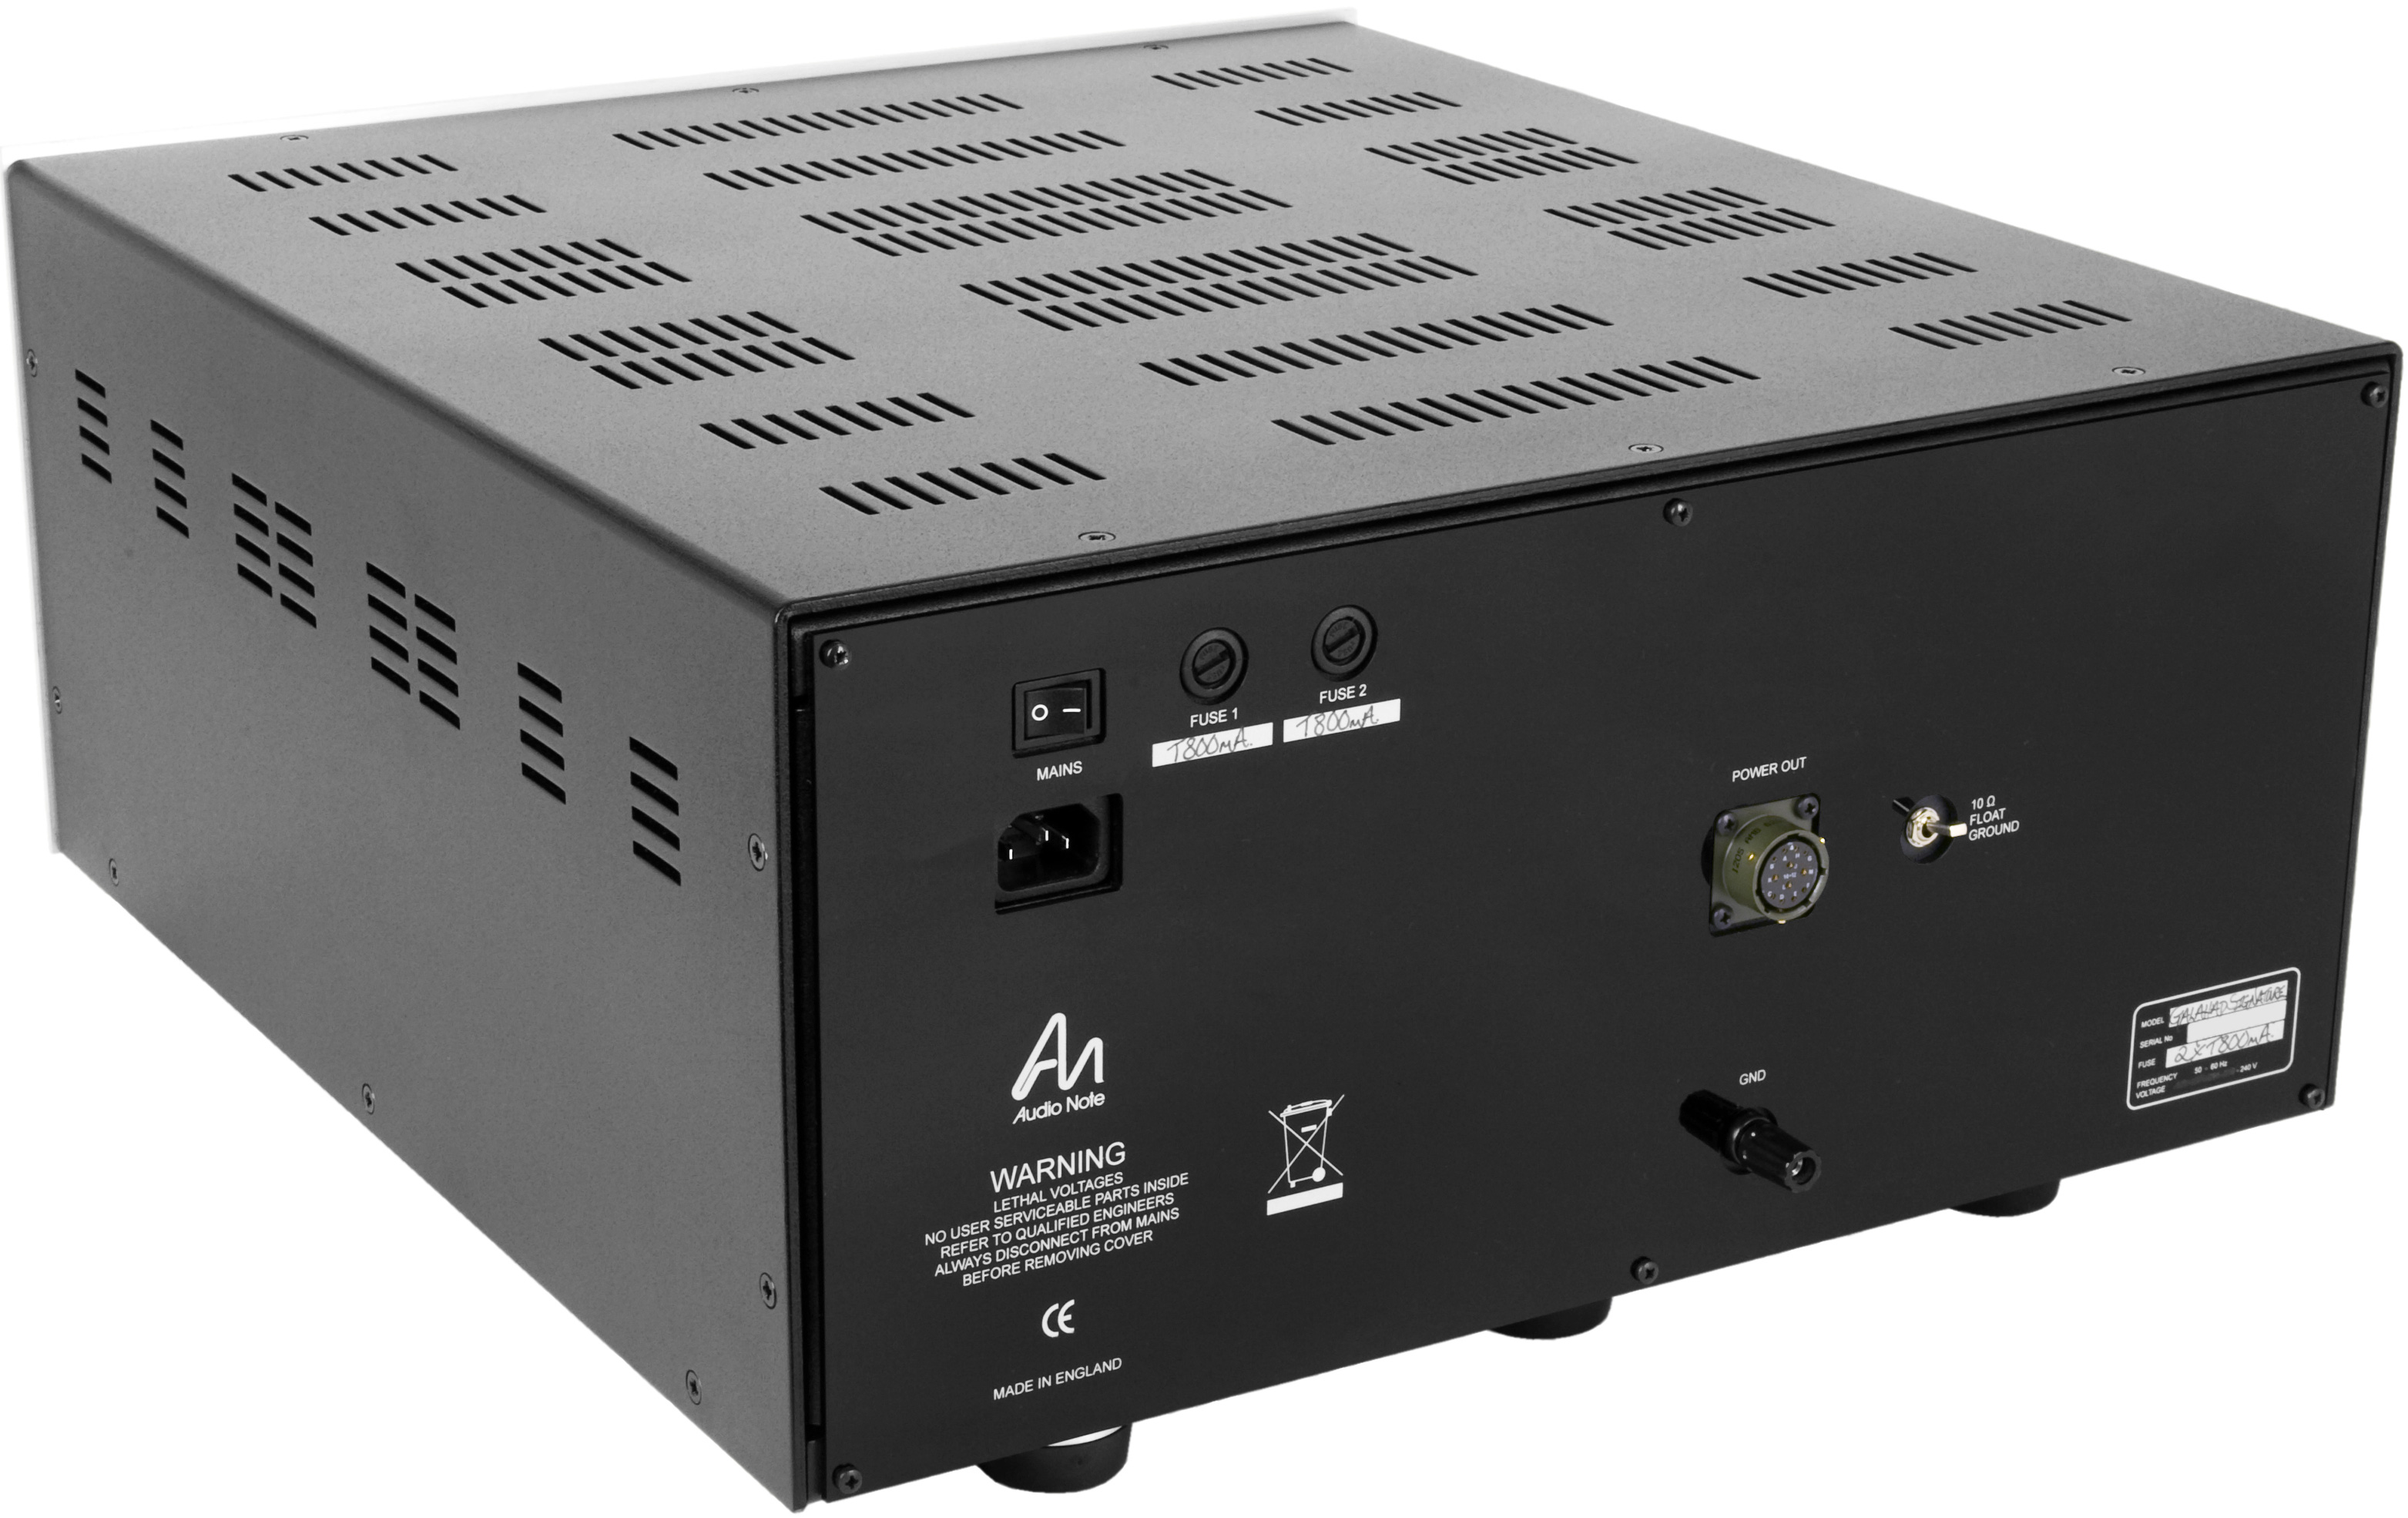
Audio Note M10 Galahad Power Supply Unit

Arrival and Set-up

No matter how hard you try, receiving new gear is always problematic, particularly interfacing with the shipper. Some months ago, I contacted Audio Note (U.K.) about the possibility of getting an Audio Note M10 Signature for review. Later, I received an email from Audio Note (U.K.) that they had completed a review sample and that DHL was airfreighting it to Houston. Subsequently, I contacted DHL and requested that the delivery be postponed for the following Tuesday so that I could arrange to be at home. You probably already know where this is going (and you would be right). Monday afternoon, I received a frantic call from Audio Note that the packages were sitting on my front porch. “Could I drop everything and go home to check on them?” I managed to get home (with my remarkably patient granddaughter in tow) to find a total of five boxes on my doorstep, two of which seemed large enough to contain a sofa and two easy chairs. I rolled them in and took anti-inflammatories that night.

Neli Davis of Audio Federation arrived Friday evening to help with set-up. She suggested that we audition the existing preamp in the system (Einstein preamp + EMM Labs MTRX amps) to get an idea of the system’s sound. As sometimes happens with good listening, we did not turn in until 3 a.m.

You might wonder how much set-up a preamp requires. Isn’t it “plug and play”? In the case of the Audio Note M10 Signature, the answer would be a resounding “No.” The preamp consists of two massive 60lb power supplies, each the size of a large tube amplifier, plus the preamp control section and the myriad of power cords and umbilicals necessary to connect everything. Given the size and complexity of all of this, the question of where to site everything becomes an issue as well. In any event, three hours later it was finally time to turn everything back on and start the warm-up and break-in process. Within about an hour, the sound began to settle in (though I sensed that more break-in was in store). The only nit was that the stepped attenuator on the preamp coupled with the high gain of the EMM Labs MTRX amps basically meant that the range of volume adjustment was distinctly narrower than ideal.


The Technology

My erstwhile publisher, Constantine Soo, previously discussed in detail the technological innovations that have made this product possible. Please see his excellent article “Audio Note UK launches the flagship preamplifier, the M10 Line Signature,” Dagogo, March 2013.


An Interlude

At this juncture, Neli and I both needed a break. The Houston Audio Society had scheduled a Christmas party for that evening and I wanted to introduce Neli around to some of my friends. We finally returned home about 9:00 p.m. with several of these listening buddies in tow. At this point, the system had been playing for about six hours and the sound was noticeably more refined. In particular, intelligibility of voices was superb; depth and three-dimensionality were improved over the Einstein and, according to Neli, would get significantly better with further break-in. I attend two, sometimes three, live classical concerts a month and the recreation of depth and three-dimensionality have always been key to my enjoyment of reproduced sound. Tonality and accurate recreation of timbre are also paramount. We had another very late evening.
The Next Day

I had not really planned on making any further changes to the system configuration; however, Neli really wanted to hear the Audio Note M10 Signature in conjunction with my Audio Note Balanced Kegon amplifiers. Moving the 230# EMM MTRX amps in and out of the system is not a task undertaken lightly, but my friend and fellow audiophile Paul Jackson was in from London – and being a strapping youth of 40, hoisted the EMMs as if they were featherweights. Not surprisingly, the combination of the two Audio Note components was a very synergistic match and continued to sound better and better the longer that we listened.

At some point, we inserted Finite Elemente Cerabases under the preamp and its two power supply boxes, which rather significantly improved the sound in all the ways that one might expect. After Neli left, I spent the remainder of the evening listening. Even at this early point in my evaluation, it was clear that there was something very special about the sound of the Audio Note M10 Signature, particularly when used in conjunction with the companion Audio Note Balanced Kegon amplifiers driving the Acapella Audio Arts Triolon Exalibur speaker system.

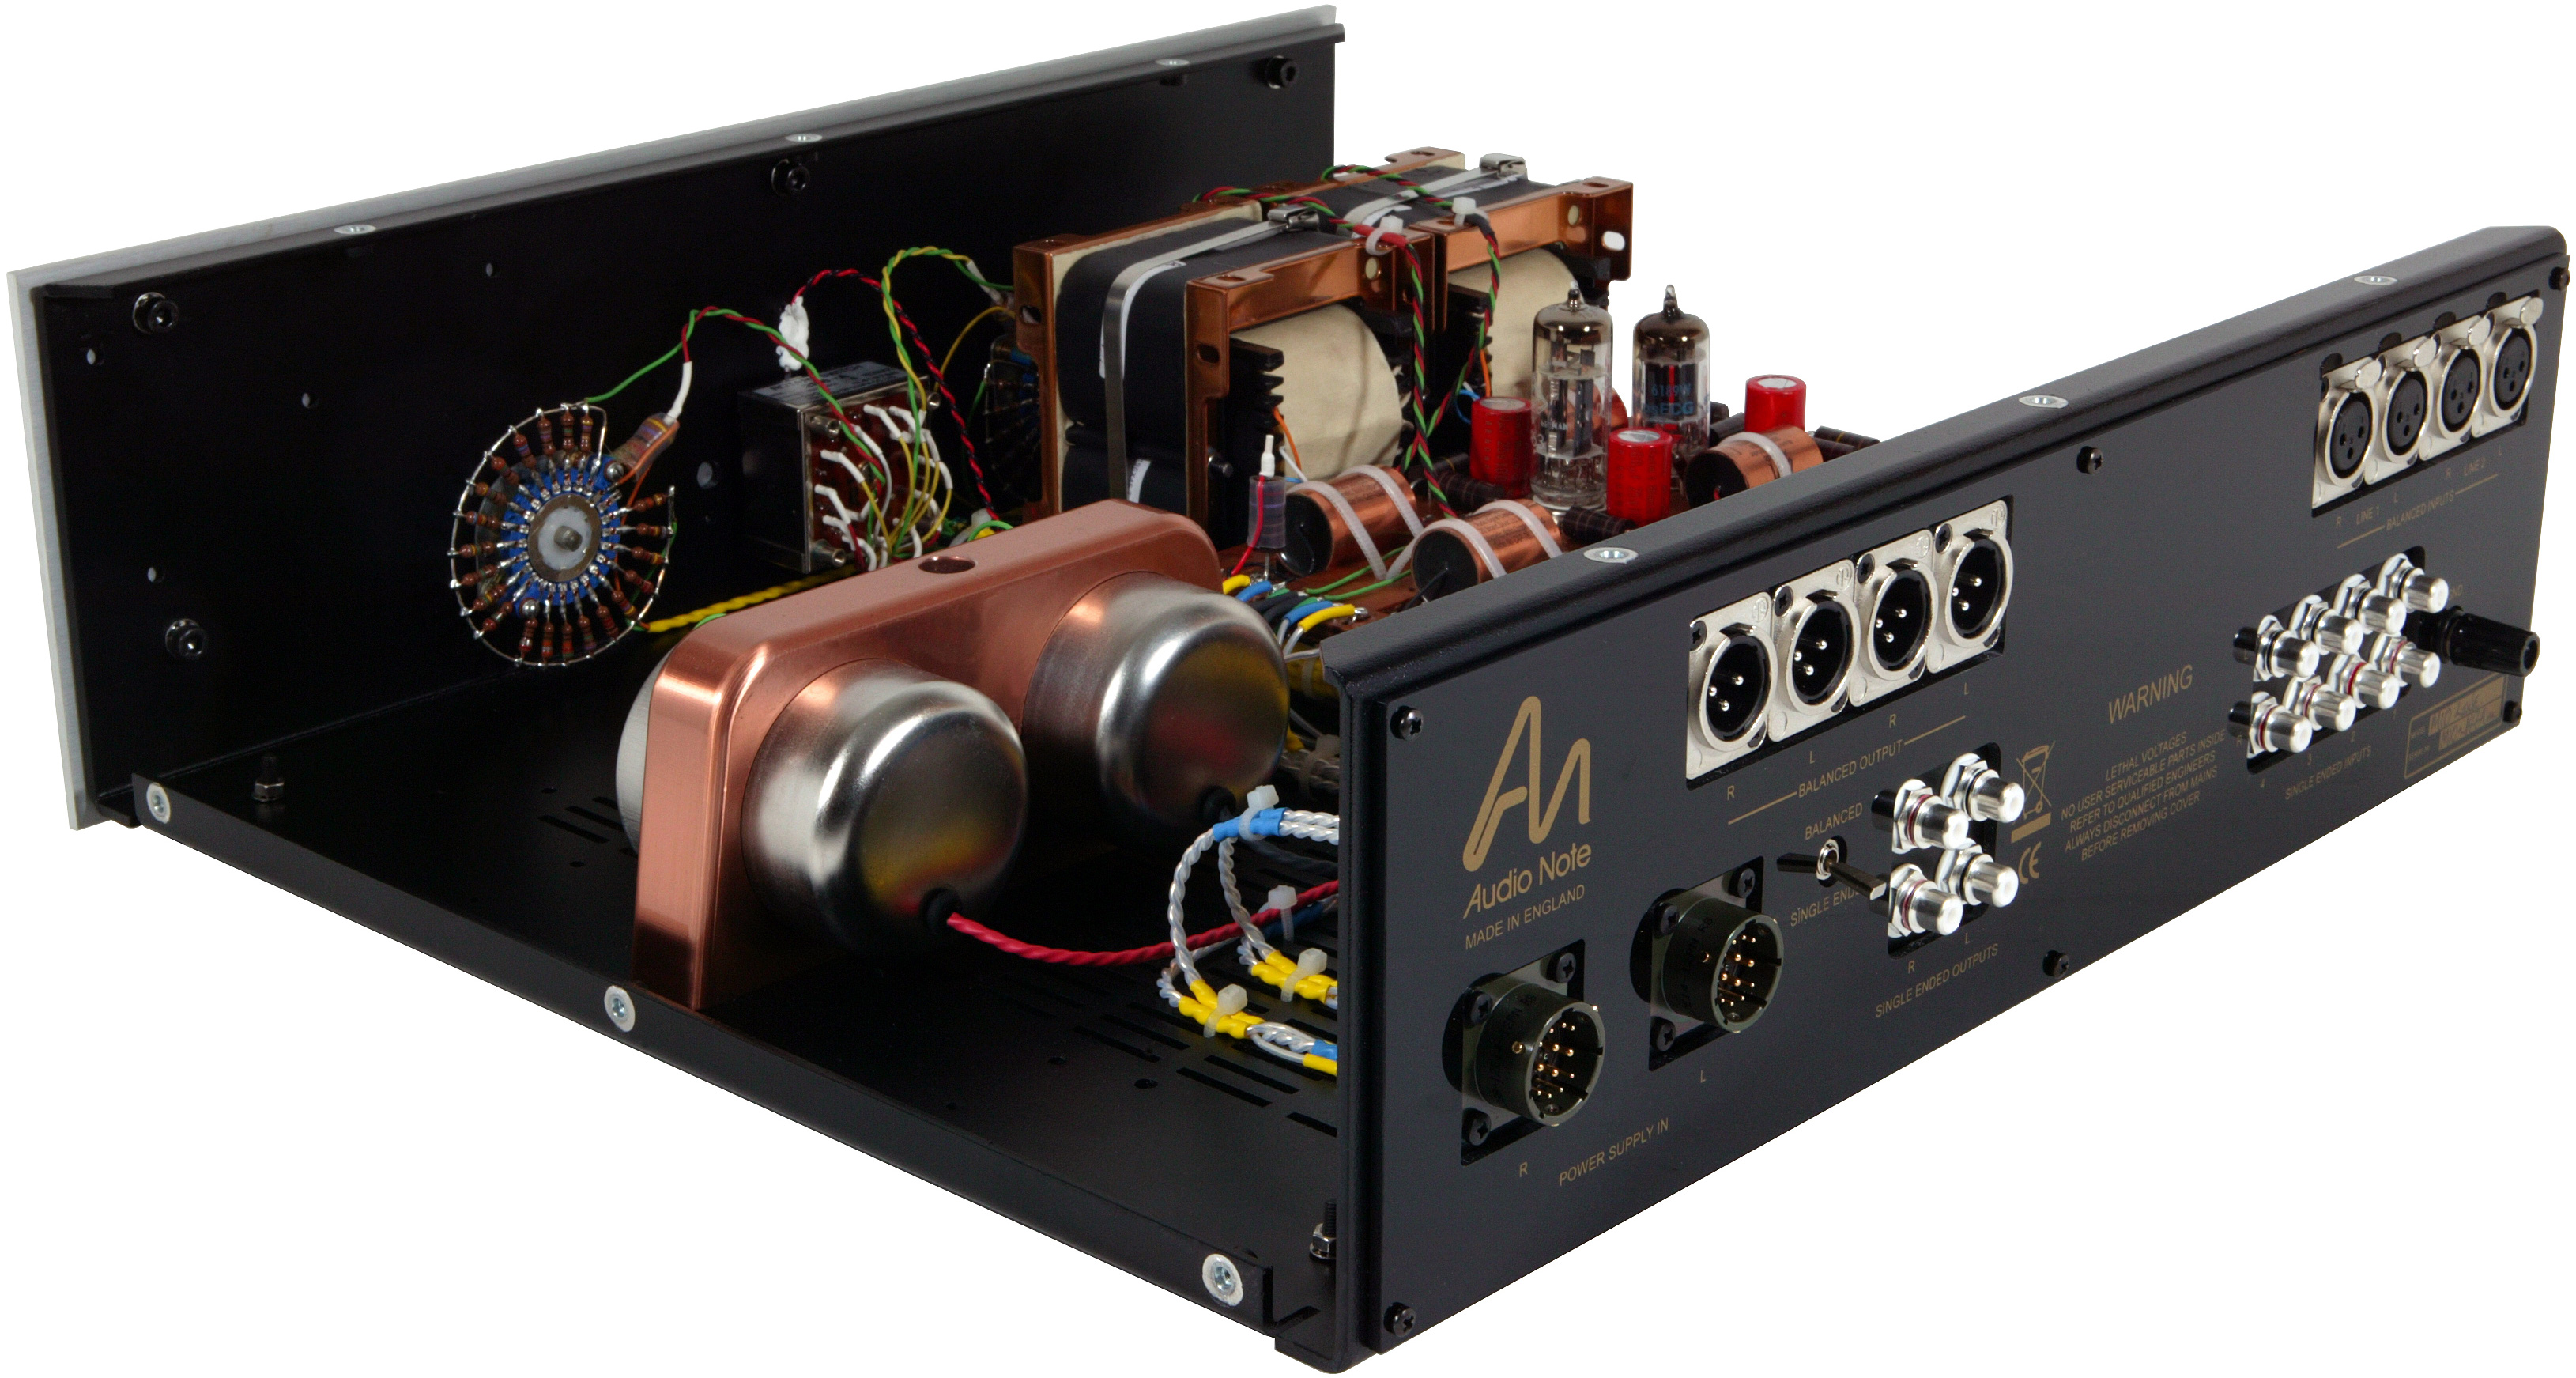
Audio Note M10 Signature main chassis rear interior

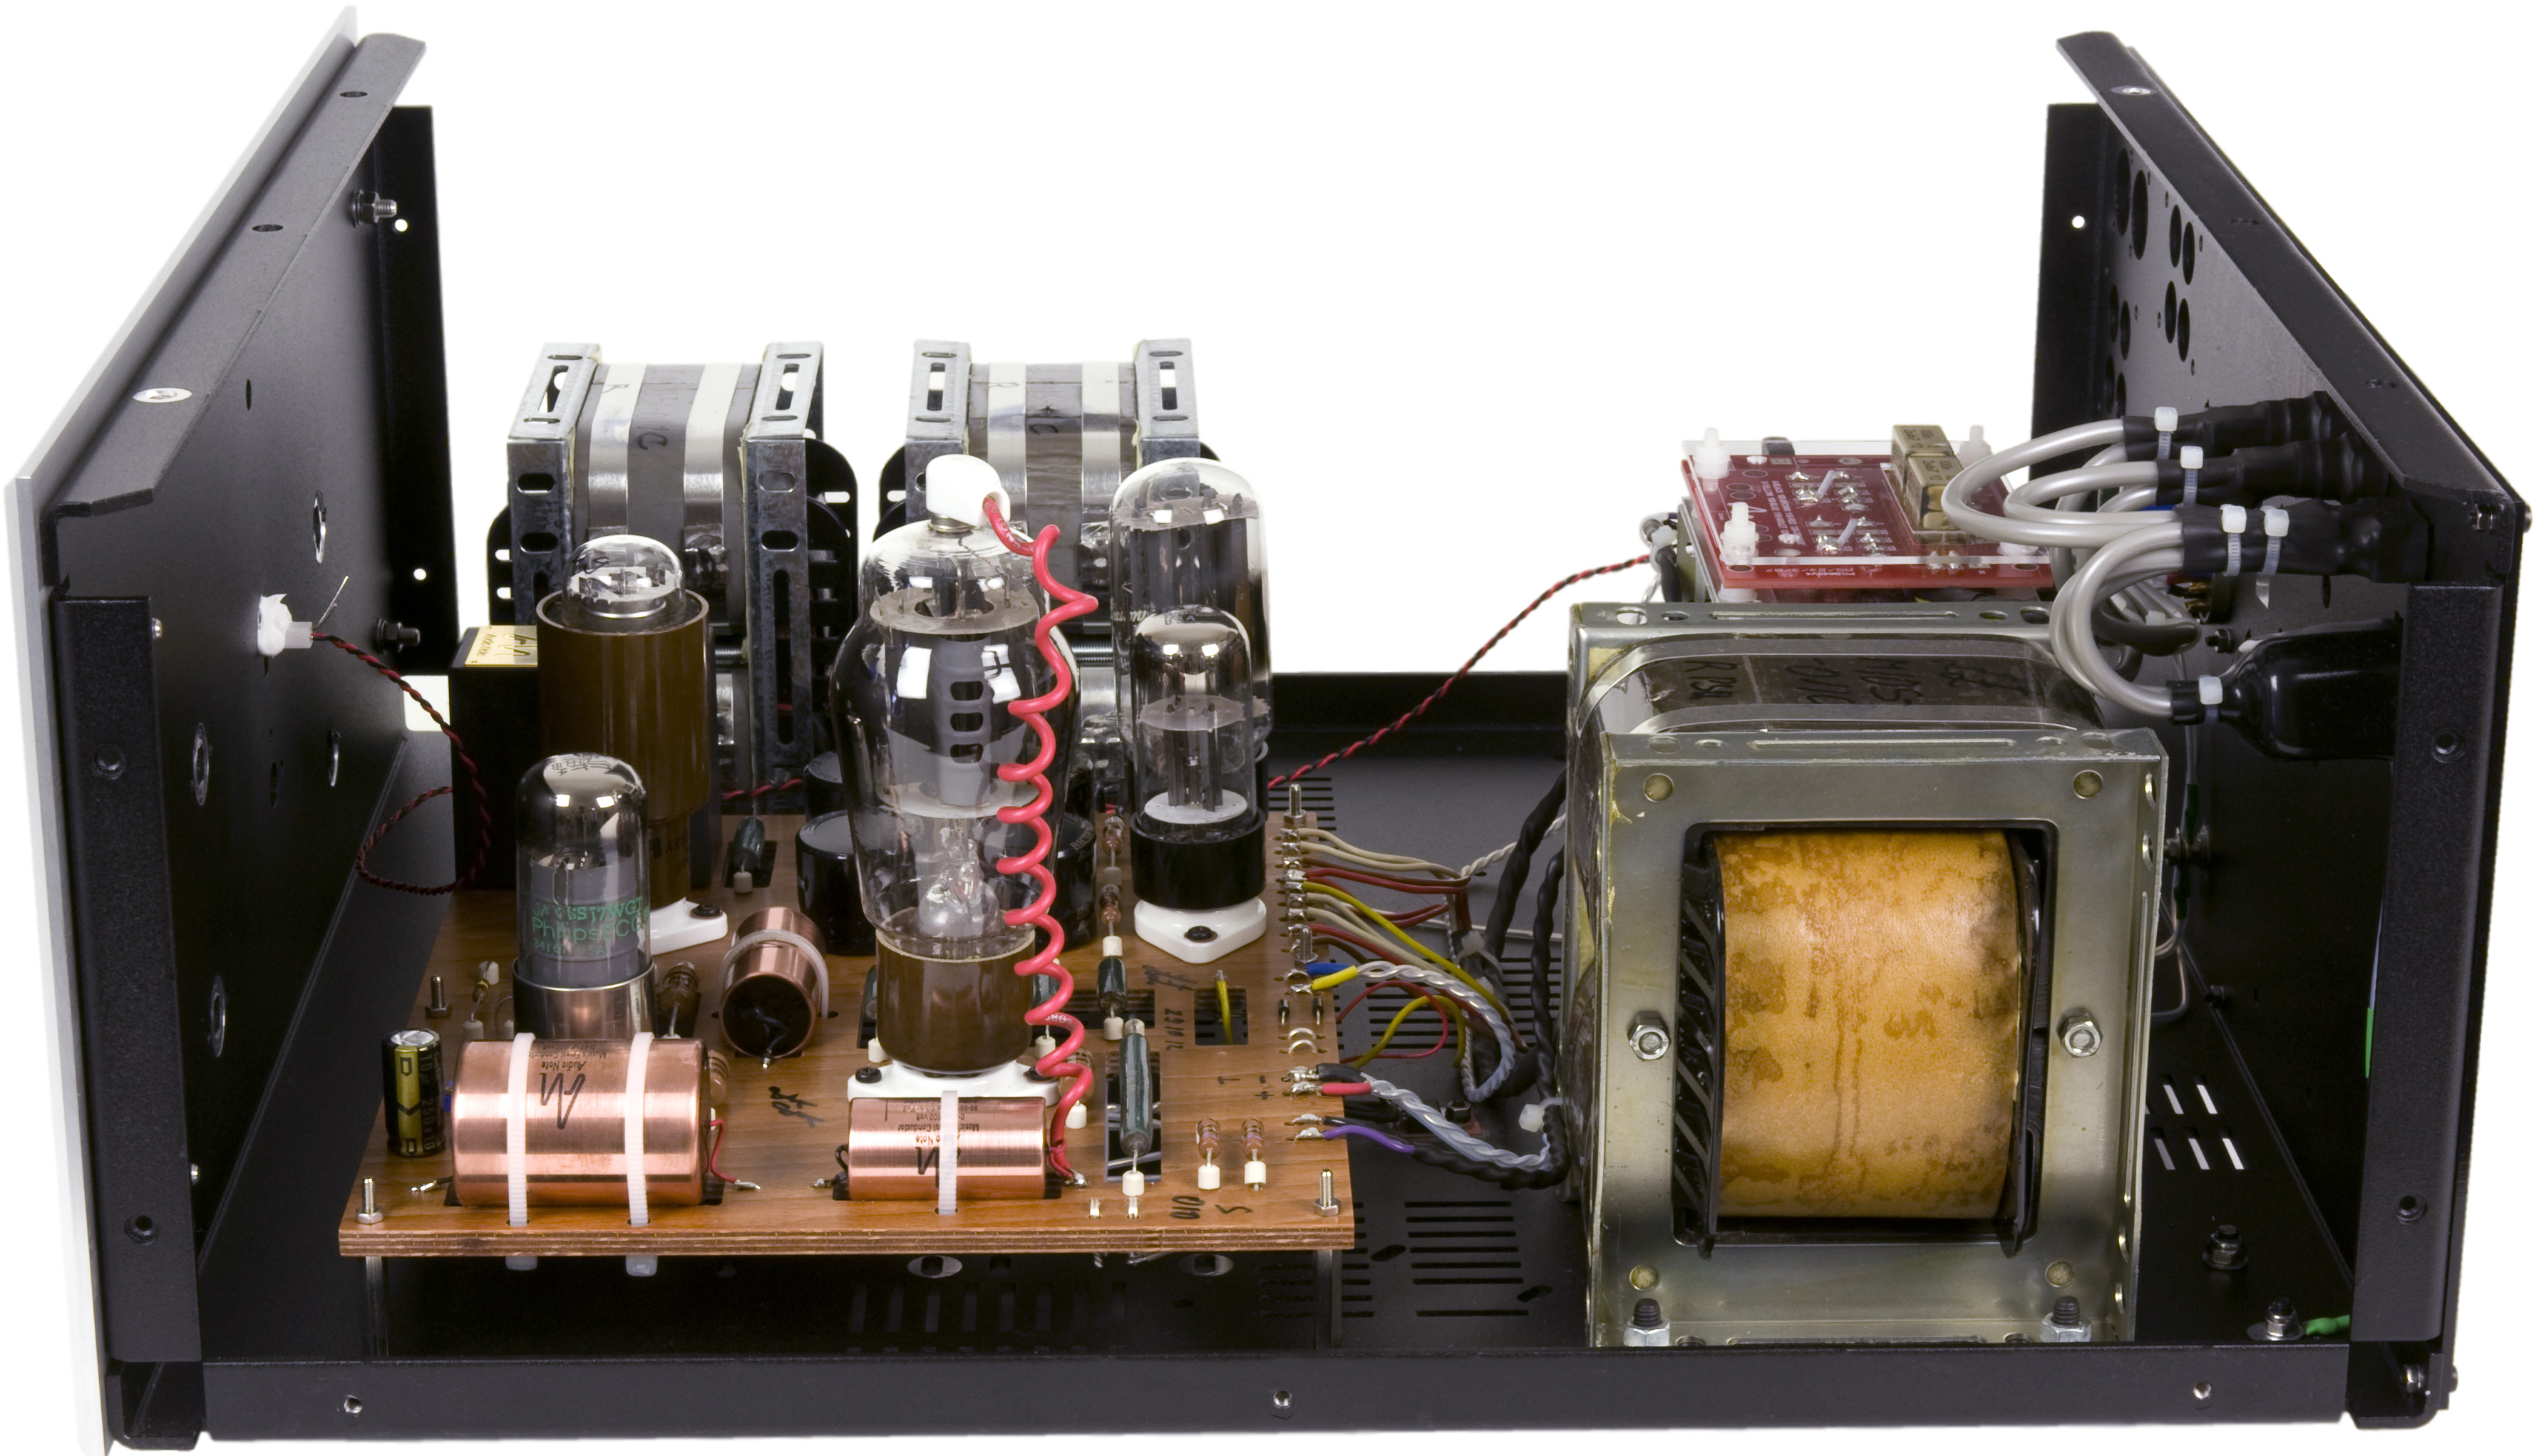
Audio Note M10 Signature main chassis interior

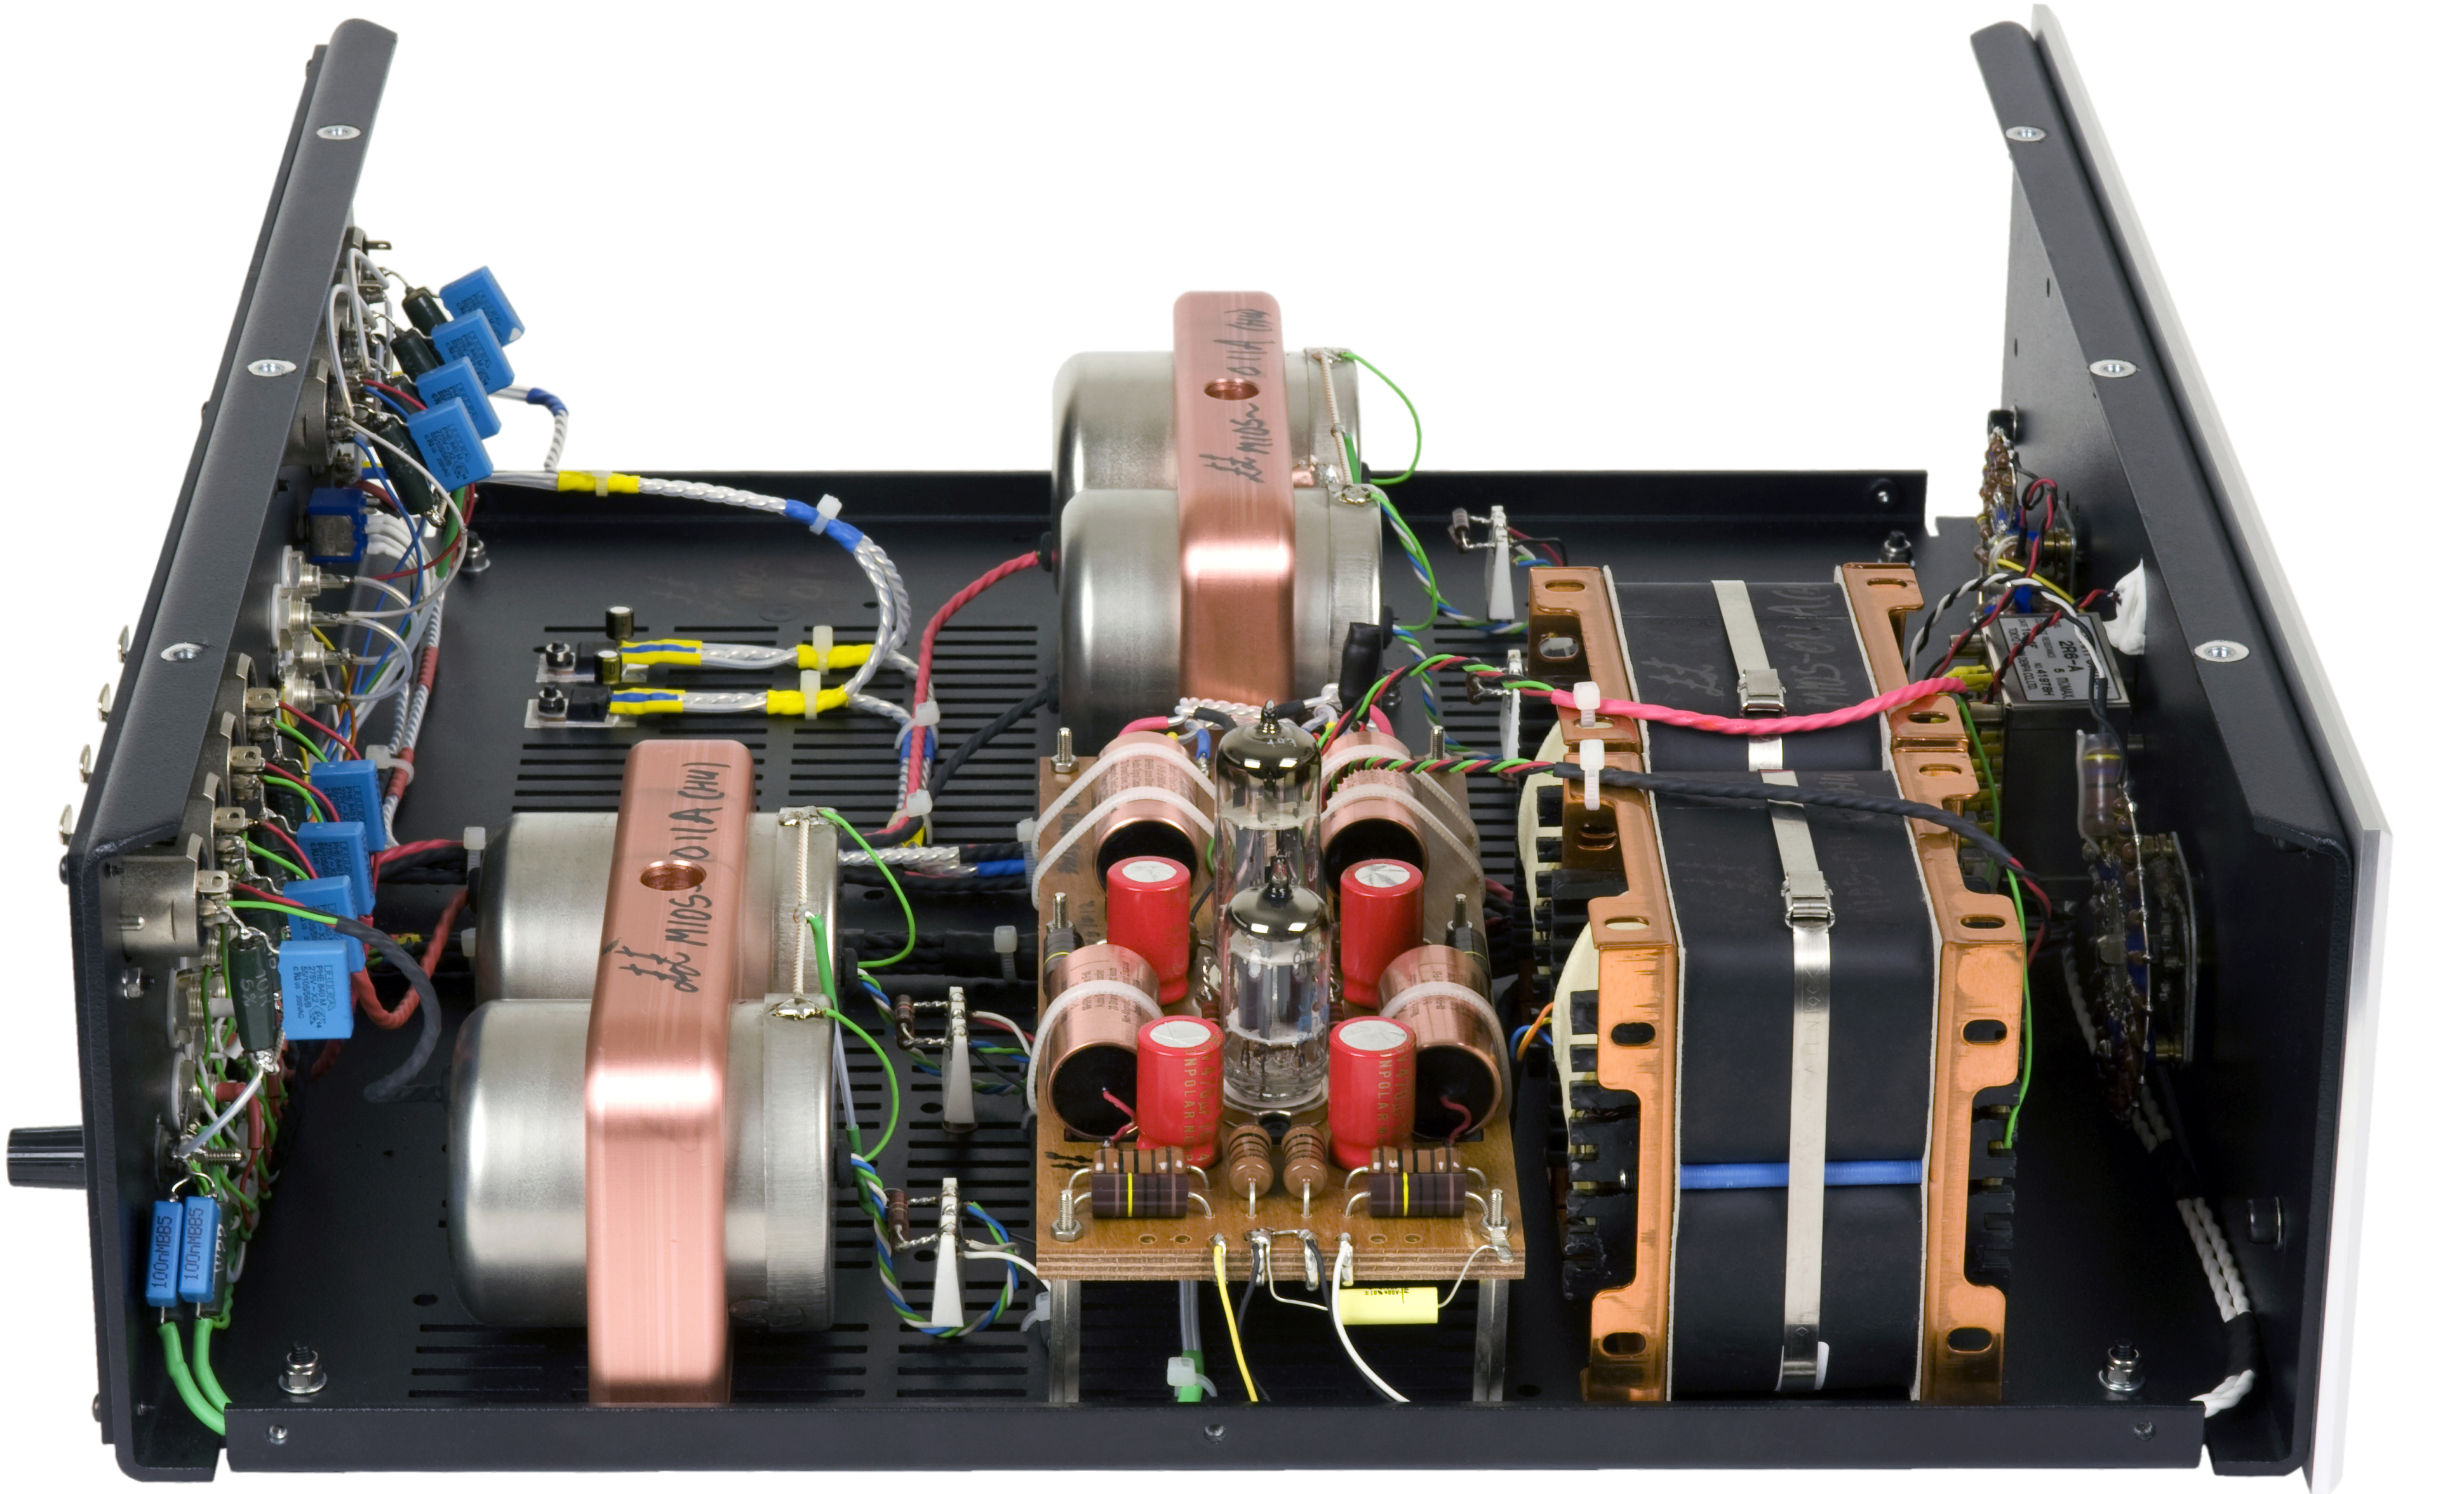
Audio Note M10 Signature Galahad PSU rear

Audio Note M10 Signature Galahad PSU interior

Break-in

I allowed at least a hundred hours of break-in before doing serious listening, though we did do some listening during that process. While avoiding extended commentary, I would just note that the M10 during break-in sounded, for the most part, as one might expect: the bass as manifested by the Acapella speakers was not fully filled-in and the treble via the ion tweeters at times seemed under-defined (especially when listening to cymbals). The overall sound could at times be just a bit “hard,” which surprised me, but which seemed to disappear over time.

A few comments about the sound at this point follow. These comments are based on listening to digital media through the EMM TX2 Transport and DA2 Processor, as my turntable was temporarily out of commission while awaiting a new compressor.

ORG did an SACD reissue of Jeff Buckley’s first album, Grace, in addition to a 45 reissue. The SACD was mastered by Bernie Grundman. We noted over a couple of listening sessions that transients were powerful, Buckley’s voice well-centered and palpable, and the drums clearly placed, loud and tight (almost too much so, but some of that may be the recording). The mastering seemed a bit bright on my system, but this SACD has sounded bright elsewhere. (One of our number was of the view that the mastering sounded typical for Grundman, and that what I might call “bright” sounded good to him.) Guitars are captured about as cleanly as I have ever heard, with excellent layering – and there are a lot of guitars tracked in. Indeed, this album is very busy in general and represents an enormous amount of work on the part of Buckley and his production and engineering team. To its credit, the Audio Note M10 seemed to be able to separate out the complex, overlapping threads of musical dialogue in an intelligible and easily distinguishable manner that made for rewarding listening.

On a CD of Strauss’s Four Last Songs (RCA, Eschenbach, Houston Symphony), the Audio Note brought out the unique tone and texture of Renee Fleming’s voice. She was louder than the orchestra and not well blended – although this was surely an issue of microphones and engineering. The orchestra was rich but this RCA re-issue, from relatively early in the digital days, is not particularly warm.

One of the most rewarding experiences for a trio of us listeners was hearing a recent live recording of the Martinu 4th Symphony with Belohlavek conducting the BBC Symphony (Onyx 4061), a piece two of us had never heard. Not only was it a joy to discover this music, but it also became clear during multiple listens over multiple days that the M10 Signature was now fully broken in and had developed a beguiling depth and three-dimensionality. The thing that was so satisfying about hearing this music through the M10 as opposed to the Einstein was that the top to bottom coherence was remarkably seamless. The musical lines are very active and cover the whole range of the orchestra. The “handoffs” between winds and strings, between cellos and violins, top to bottom of the range, was effortless. Complex musical lines were easily followed throughout the thickly orchestrated symphony and made clear sense to the ears. Put another way, when the music interwove many different threads, it was easier to pick out a particular thread and follow it than I have typically experienced. The retrieval of extra detail in the bass was superb – the cellos and basses chugged and thumped along powerfully without in any way becoming overbearing. The combination of a lowered noise floor and added resolution of low level detail significantly increased the amount of ambient information coming through. Recreation of the reverberation of the bass drum in the hall, bass slam, and palpability were all excellent.

The post Audio Note M10 Signature Preamplifier Review appeared first on Dagogo.

Postscript to Audio Note M10 Line Signature preamplifier Review

$
0
0

At some point after my Audio Note M10 review is written, a reviewer has to make the decision whether to purchase the review sample or return it to the manufacturer. For me, this is generally a fairly straightforward process as, other than with respect to digital pieces, I seldom make changes to my system. In this particular instance, the decision was very difficult. On the one hand, the M10 Line Signature was clearly and by a rather appreciable margin the single best preamp that I had ever had in my system. In all honesty, it does things that I would not have thought were the province of a preamp. On the other hand, its price is comparable to that of a Mercedes SL-450. At some point during this deliberation, the M10 Line Signature began to develop low-level noise in one channel. Here it would have been very easy for the manufacturer to provide new tubes and then try to troubleshoot the problem over the phone. To their credit, Audio Note asked that I return the control section of the preamp to the factory so that they could run a complete diagnostic and ensure that something more serious was not happening. They promptly arranged for DHL to pick up the unit and, at their cost, airfreight it back to London. Although they quickly determined that a tube was at fault, they wanted to keep the unit and burn it in to ensure that the problem did not recur. Given that I was taking a break from work to visit a friend in California and attend the inaugural LA Audio Show, this seemed like a good plan. Two weeks later, the factory contacted me to arrange return shipping. At this point, Peter told me that while the unit had been at the factory they had decided to replace the 20-step attenuator (actually a multiple silver contact switch with discrete resistors at each position) with a new design that allows 36 steps, which they feel is sonically superior.

Shortly thereafter, I received the “modified” unit and installed it in my system. The sonic attributes described in the initial portion of this review remain true of the modified unit, but some further improvement in the sound is apparent. The new volume controls are everything that I could have asked for and more. The additional range of adjustment is more than adequate for my needs and, as a side benefit, I believe that the new attenuators result in a further slight reduction in distortion, an even lower noise floor, higher resolution, and a more natural presentation of bass. Note that I am not saying more bass or even better-controlled bass, as those areas have always been strong points of the unit.  In this instance, I am thinking more natural and more of one piece with the midrange and highs.

One of the things that I find most beguiling about the M10 Line Signature is its ability to take recordings that in the past I would have found unexceptional and somehow breathe life into them.  Don’t misunderstand, exceptional recordings still are exceptional; however, I am beginning to realize that many recordings that I might have passed over in the past are truly enjoyable. On another note, the bass being produced is exceptional both in terms of control and slam. Again, records that I do not remember as ever having real bass now are surprising me with their bass content.

While I am relatively certain what my decision would have been even without the new volume controls, it was another point in favor of keeping the unit long term.  In the end, I put my money where my mouth had been and wrote the check.


Copy editor: Dan Rubin

The post Postscript to Audio Note M10 Line Signature preamplifier Review appeared first on Dagogo.

Legacy Audio Wavelet Review

$
0
0

The Anti-separate

When I was growing up, my parents had a fancy Telefunken console audio system. It was an all-in-one system: speakers, AM and FM tuners, preamp, turntable and amp. My very first stereo was similarly an all-in-one unit. However, as I began to progress down the path of the audiophile, or should I say “tumble down the rabbit hole,” I inevitably moved to separates, including monoblock amps, bi-amping, 3-box preamps, separate DACs, transports and reclockers, and virtually every other configuration you can imagine. Of course, this meant more cables, racks, isolation devices and related paraphernalia, and more complexity in general, not to mention expense. It never occurred to me to go back to more integrated, multi-function devices: in fact, I believed that path would take me backwards, not forwards, on the audio trail. That is, until I came across the Legacy Wavelet.

Anyone knowledgeable about high-end speakers knows Legacy Audio, located in Springfield IL. Over the years, company founder Bill Dudleston has built some of the best speakers you can buy at various price points. Luckily for us, his company isn’t as quiet as it used to be, and now many are aware of the excellent, reasonably-priced speakers he sells. I hope to expand your consciousness further by reviewing what in my opinion is the best bang-for-the-buck component I’ve ever encountered – and I’m including some fabulous components.


First Encounters

I first heard the Legacy Wavelet several years ago at Legacy Audio’s AXPONA Exhibit for the debut of the company’s new top-of-the-line V speakers. I was absolutely impressed by the sound of the V system, but in the course of listening became aware that a box called the “Wavelet” was the brains of the system – and it included room correction. Over the next few months I did some research on the V system, and the Wavelet in particular. It became evident to me that the Wavelet was a fascinating component on its own, and that the approach taken to room correction had the potential to eliminate the artifacts that I periodically heard in existing room correction devices. Eventually, I determined that I just had to ask to review it.

It’s important to note that I’ve lived with the Wavelet in my system now for nearly a year, so this review represents a long-term experience, not just a one-month plunge into a new toy. During this time there has been a software upgrade that addressed all of the initial glitches I experienced in the unit, so this review is of the upgraded unit.

So What Is It?

The Wavelet is a preamp, DAC, crossover, equalizer and room correction device. While Legacy’s description doesn’t include any reference to an equalizer, but the “Contour” function of the device works like a really good, sophisticated equalizer; more below. In the past, I might have dismissed such a component as a “Swiss Army Knife” that may do a lot and doesn’t do anything exceptionally well. But nothing could be further from the truth.

The Wavelet is controlled by a control app that you can load on your phone, tablet or other appropriate device. The Wavelet control app has 5 tabs that group certain functions: VOLUME, INPUT, SETTINGS, UPDATE and BACK. Volume, Input, Update and Back are all what you would expect. However, the SETTINGS tab has several sub-tabs: Mode, Home Theater Mode, DAC, Presets, Contour, Room Correction, Setup, Front Panel and System Update. Since it’s central to initial setup and also the main reason the Wavelet first interested me, I’m going to start with the room correction feature.


Room Correction

The Wavelet uses room correction technology from Böhmer Audio of Sweden. Setup is very easy. You place a microphone in the room a set distance from one main speaker, run the test tones, then repeat with the other speaker. The captured set of data is transmitted to Böhmer (you need an internet connection), where it is processed to compute correcting frequency response curves, which are then loaded back into the Wavelet.

The Room Correction tab in the app is self-explanatory and operation is completely effortless. You can engage room correction or turn it off, though I can’t imagine for the life of me why you would ever turn it off. Last summer, I redid my dedicated listening room in an effort to minimize room modes (see my 2-part writeup in Dagogo), so my room is pretty much as good as it will get acoustically. My intent was still to use room correction, but to minimize the correction required. Nonetheless, switching the room correction in and out demonstrates that there are still improvements to be obtained. For a more dramatic test, I set up the Wavelet in another room that houses a secondary audio system. Using the Wavelet in this room starkly demonstrated how acoustically disruptive a room can be – boomy mid- and upper-bass and glassy highs with average soundstaging. Switching in room correction immediately tightened the mid-bass, brought out the lower bass, and separated and layered performers in the soundstage.

It also is instructive to compare the Wavelet’s approach to room correction to my previous room correction device, the Lyngdorf RP-1. I like the Lyngdorf very much. It greatly improved the sound of my system in my listening room, and its pluses far outweighed its few anomalies. The principal anomaly that I thought was induced by the Lyngdorf RP-1 was a “lift” in the volume of the mid-bass when in Neutral mode which, of course, is supposed to be “neutral”. I was able to make certain limited adjustments with the RP-1, but I felt that the adjustment options attenuated the bass a bit too much. Thus, I was faced with the choice of a bit too much or a bit too little of the mid-bass. When I substituted the Wavelet this anomaly disappeared. Not only did this anomaly disappear, but I could exactly tweak the bass output to adjust to my room, speakers and amp. Finally, a certain congestion of the music in the lower mids I didn’t realize was there also disappeared.

The Wavelet’s room correction is so easy to set up, and so obviously reveals and corrects room anomalies, that you should consider acquiring the Wavelet solely for this function. As we will discuss, combining this with an excellent DAC and the ability to contour the sound makes this device an absolute no-brainer.

Time Domain Graph

The DAC

My original intention was to use the Wavelet’s room correction and contour features with my MBL 1611f DAC. Nonetheless, for purposes of this review, I created a setup that allowed head-to-head comparison of the MBL with the Wavelet’s DAC. To my surprise, through multiple listening sessions, both alone and with other listeners, I had to reluctantly admit that it was not easy to distinguish between the sound of the two DACs, and even harder to determine which was “better.” I had originally selected the MBL because I always liked the sensation of musical body the MBL DAC imparted. Nonetheless, in direct comparisons, the perception of additional body was not consistently clear. Moreover, the Wavelet with room correction engaged sounded significantly better than the MBL without room correction, and as will be discussed below, the added effect of the Presets and Contour functions only made the differences more obvious. Compared to the MBL, the Wavelet’s DAC is slightly more “neutral,” but it would never be described as analytical or cold. Like the MBL, it coveys great detail without making the detail sound artificial, it has a very vivid soundstage, and performers are well fleshed-out. If you search out my prior DAC review on Dagogo you will see the spectrum of DACs that I’ve owned and reviewed. Compared to those DACs, some of which were analytical while others were rich and full-bodied, the tonality of the Wavelet is smack-dab in the middle. The only DAC that I’ve heard that is arguably more detailed is the Bricasti M1, but I’d say the Wavelet DAC is just a bit more natural.

The DAC tab in the control app gives you the option to select either a preringing filter or an apodizing filter. My ears selected the apodizing filter, and I haven’t found any recordings where I preferred the preringing filter. However, you may well feel otherwise, and it’s great to have the option. In my personal listening, the Legacy’s apodizing filter resulted in musical body that was very similar to the sound of the MBL.


The Preamp Function

After doing the comparison of the Wavelet’s DAC to the MBL 1611f, I set up a head-to-head comparison of the preamp function of the Wavelet to the Pass Labs XP-30 three-box preamp (see my review in Dagogo).

I have always had a bit of prejudice against digital volume controls. This can be traced back to the early days of digital volume controls where attenuation was achieved by “throwing away” bits and affecting resolution, especially at low listening levels. The Pass Labs XP-30 had the best low-level resolution I’ve ever heard, providing superb detail and maintaining bass/treble/midrange balance even at the lowest listening levels. In a carefully matched comparison with precise volume matching, the XP-30 won out by the thinnest of hairs, and only when playing music at whisper-quiet levels. For a while I used the XP-30 as the preamp, and the Wavelet for all other purposes, but after a few weeks I realized that I really couldn’t hear the difference in normal listening.

Could I get more detail and resolution from a combination of other components? Certainly. The Bricasti played through the Pass Labs is about as high resolution as you can get. But then you need room correction, because without room correction the sound becomes unbalanced and colored. And, of course, you’re talking a lot more money.

Wavelet Control Interface

But Wait! There’s More!

The MODE option under “Settings” allows you to implement Inverted Stereo and Inverted Mono in addition to the traditional Stereo and Mono options. I don’t detect as much of a difference as some when switching between Stereo and Inverted modes, but there are some recordings where the ability to invert is a godsend, and the Wavelet app incorporates this handy feature both in stereo and mono, which I haven’t seen in other systems.

One of my favorite features in the Wavelet is the CONTOUR tab. It provides a sophisticated equalizer-like function that lets you adjust frequency ranges in tenth-of-a-decibel increments. Don’t be fooled by the fact that you are limited to adjustment of 5 frequency ranges. These are exactly the ranges you need to fine-tune the sound: Brilliance, Low-Treble, Upper-Bass, Mid-bass and Low-Bass. In addition, there is a very nifty setting called PUNCH that affects dynamic range. Together, these six adjustments allow you to perfectly tweak your sound. The Wavelet also permits you to create and save up to eight contours in the Contour mode, so adjustment is easy. I only use three contours, with one being used on most recordings (90%+ of the time), one for very dull/flat recordings, and one for very low volume listening.

The updated version of the Wavelet software provides “Standard” and “Restored” options. The Restored option in the current software version is my preferred setting. It adds natural soundstage depth and layering. When switching to Restored from Standard, there is an initial impression of loss of volume, which is often mistaken for a loss of fidelity. This is definitely not the case with the Restored option. Selecting Restored and slightly goosing the volume immediately reveals the superiority of the Restored setting. The apparent initial loss in volume seems to be due to the fact that some performers move further back into the soundstage (which is how they present live), while in Standard, the whole band is more at the front end of the stage. This is a great feature and I encourage you to give it careful listening.

The revised Preset function was what allowed me to also eliminate my BSG Signal Completion Stage. The BSG has the ability to “fill the venue” and add layers to the recording the way you hear music live. Occasionally, however, I’d needed to turn the BSG off when it created artifacts, such as “stretching” a piano to make it 20 feet wide or creating a surround effect when it wasn’t appropriate. Though the Wavelet’s “Restored” function doesn’t quite fill in the room the way the BSG does, it clearly gives you significant additional depth and width in the soundstage, and without such artifacts. As it turns out, I was simultaneously experimenting with the Synergistic Research HFT’s and FEQ combination and found that I was able to get the same effect as I got with BSG by using both the Wavelet and the Synergistic components, but without any artifacts.

The ability to tweak with the Wavelet is enormous. Between the “Contour” and “Presets” functions I can fine-tune the sound in ways I’ve never experienced. My approach in tuning my system is to attend live performances in good venues and then promptly go home and play similar music. Occasionally, I’m lucky enough to be able to listen to the same music by the same performers, but that’s rare. More often it’s different music by the same performers, or different performers in the same genre, such as big band jazz, solo male baritone, bluegrass, etc. In the past, I’d switch between the limited options available with the Lyngdorf and try to decide which setting sounded closest to the live performance. There was always futility in this endeavor – some aspect of the performance always had to be sacrificed. However, with the Wavelet I’m not stuck with rigid preset choices. Instead, I can directly dial in the sound I recall. I’m not saying it doesn’t take patience, but if you work at it, you can get it just right.

My system is now the most “tweakable” it’s ever been. Between the Wavelet, the HFT/FEQ combo, and the Stealth digital cable and speaker cables that incorporate the tuning ring, I can dial the system in to a degree I never previously experienced.


Conclusion

I had previously spent 5 years researching and listening to assemble a combination of high end separates which, to my ears, was pretty much ideal for my room and personal tastes. However, after countless hours comparing many component combinations (the principal ones are described below), I elected to purchase the Wavelet and rebuild my main listening system around it.

This is what the Legacy replaced in my system: 1) the MBL 1611F DAC, specially modded to include MBL’s own volume control and analog inputs; 2) the Lyngdorf RP-1 room correction device, and 3) the BSG Signal Completion Stage. At retail, this totaled $32,000 of equipment. The Legacy Wavelet is under $6,0000. I was very concerned about replacing these components. I had spent years researching and listening to assemble a combination that, to my ears, was pretty much ideal for my room and personal tastes.

The DAC in the Wavelet is competitive with the best DACs available, the room correction is better (IMO) than all others I’ve heard, and the digital preamp, crossover and equalization features are of the highest order. The Legacy Wavelet led me on an entirely different path that has upped my listening enjoyment. Highly and unreservedly recommended, even for those who have extremely high-end components. The Wavelet is greater than the sum of its parts.


Copy editor: Dan Rubin

The post Legacy Audio Wavelet Review appeared first on Dagogo.

PS Audio Sprout100 integrated amplifier Review

$
0
0

If PS Audio’s Sprout100 has all the answers, you can just imagine the questions.

I cannot tell you the number of times aspiring audiophiles and existing ones who share my penchant for travel ask me online and in person to make recommendations for them. And, what they have all in common is their particular criteria that it be something they:

  1. Can be proud of around their friends and audiophiles (I have to chuckle that the two seem to be mutually exclusive)
  2. Will not break the bank
  3. Can make their office/secondary solution
  4. Will travel well nationally and internationally

The Sprout100 ticks all the boxes and then some. It poses a headscratcher of a question itself: What does it not do for $599? And as you can see from the specs listed below, not much is the answer. How one judges PS Audio’s latest incarnation is a matter of perspective, so I’m going to look at it as the core of 3 systems: starter, office, and travel. Normally, specifications find themselves at the end of a piece, but the Sprout100 is nothing short of extraordinary for the price.

Specifications (file this on what doesn’t the Sprout 100 do?)

  • Output power 2 x 50 watts @ 8 ohms, 2 x 100 watts @ 4 ohms
  • Digital ESS Sabre 9016 DAC
  • Optical supports up to 24/96 PCM
  • USB supports up to 24/384 PCM and DSD 128
  • Remote control (controls sparse yet functional and the unit itself surprisingly magnetic)
  • Volume Controls – continuous activation
  • Mute
  • Power On/Off
  • Indicator Light (Bass Boost)
  • Enabled – White
  • Disabled – Blue
  • Mute – Dimmed White
  • Sub Out
  • RIAA Phono Stage
  • Universal Power Supply (for those who like to TRAVEL!)
  • RCA Analog In/Out (no skimping here)

That all this comes in one box which I would liken to the size of an early model Apple Mac Mini is hard to believe, and I’m sitting right in front of the unit. So let’s get to those systems.


Starter System

‘So, you want something versatile? You want something which you can build a system around?  OK, oh there’s more. You move a lot and it has to be transportable. You’re not sure if you’re going to stick with records and want the flexibility of digital. You want to be admired and respected by your circle of friends for your gear. Is there anything else? You want it to be an investment in your future. Am taking that to mean you want for it to be relatively inexpensive and made to last?

The above is pretty much an aggregate of what those starting out on the Hi-Fi journey toss my way. And, while taken on the whole, it is a tall order, the Sprout 100, much like Jeopardy in reverse, is the answer to all the questions. In order to position it as the heart of a starter system, I first had to come to grips with the fact that it is an integrated amplifier, a DAC, and a phono stage all in one, with a SUB OUT thrown in for good measure. Like any proper sommelier it’s my duty to work out the pairings, so with respect to price, not function, and the focus being on a starter system, I paired the system with kit that I have at home costing no more than $500 per component.

Speakers:  ELAC Debut B6, KEF Q100, Q Acoustics 3020, and Pioneer SP-BS22-LR. A decent array of affordable functional speakers well under the price cap and all of them performed admirably. The extra power, the oomph of 50 watts per channel, did indeed help matters as it was not necessary to push the speakers to their extremes and if I recall, in my youth and yes even today, I do like a bit of volume. I alternated positioning of the speakers on my trusty pair of Pangea DS-400 24” stands, a pair of ISO ACOUSTICS Medium adjustable monitor stands, my IKEA end tables, kitchen stools, and Kallax storage units. In any configuration/permutation I was not let down. Nothing to sneeze at here.

Turntables:  Rega P1 fitted with stock Rega Carbon cartridge, Pro-Ject RPM1 Carbon fitted with stock Sumiko Pearl and a Parasound LT 900D fitted with a SHURE M97 XE cartridge. I included the last turntable for no other reason than sheer whimsy, and I must be one of the few to proudly proclaim ownership.

To be honest I was not expecting much from the phono stage. At best I was hoping for it not to hum too loudly and for there not to be any RF interference. Now, before any of you get any ideas, let me share this: Last year I acquired six budget phono stages ranging from $90 to $350 and all but one of them produced a nasty hum and static-laden local AM radio reception. I figured with everything else going on inside the box, surely this would be the weakest link. In a word . . . wrong.

I proceeded to spin records that someone starting out on this journey would, so up went pre-owned rock, jazz and classical recordings, all of which were dutifully cleaned in advance of being spun. The phono stage was and continues to be quiet. Given my expectations, the Sprout100’s phono stage far surpassed my wildest. That being said, it is not going to replace the phono stage in my primary system or my secondary system for that matter, nor do I expect it replace anyone’s primary, but for someone starting out this is not bad, not bad at all. Of the three turntables, I got the best results out of my Rega P1 and highly recommend it to starters as an un-fiddly piece of kit.

Digital: Apple MacBook Pro running Audirvana Plus and Roon. As my home is exclusively an Apple shop when it comes to computers, these are my two playback software solutions. The latter just squeaked under the price-cap, just barely. Using a standard USB cable, nothing fancy, and at closer examination an $11 Belkin USB A/B to connect to the Sprout100, again I was pleasantly surprised. I have listened to, analyzed and reviewed my share of DACs over the years. Is the integrated DAC here the best? Hardly. Will it put some DAC’s costing as much or more than the Sprout100 to shame? Yes. Not that it is subjectively so much better, but that it comes too close for comfort.

The computer had no issues recognizing the DAC, nor did either of the software applications. From redbook CD standard to PCM 348 and DSD 128, the Sprout100 admirably handled anything tossed its way. My digital library is vast, so after a barrage of Hi-res and Super Hi-res I settled down to playing files that someone starting out would, more than likely, have at their disposal. What’s not to like? The sound was/is enjoyable, pleasing even, and I was not fatigued in the slightest. We have to remember that DAC’s have come a long way, so now some of the most affordable ones on the market sound damn good for what they are.

This is not to say that there were no issues with the Sprout100’s operation where computers are concerned. In an attempt to reduce power consumption and lessen the overall heat of the unit, PS Audio decided that when the input selector is on anything but digital, USB is powered down, and while this is logical, computer operating systems, both Windows and Mac (OS X) will generate pop-up messages alerting the user that a USB connection is malfunctioning and has been dropped. The Windows error is even more graphic than its Mac (OS X) counterpart. Switching the selector back to Digital (USB) put all to right.

The Bass Boost function is another story. I can understand the logic behind providing Bass Boost, which PS Audio claims adds +8 dB, and given that there’s a Sub Out on the unit, I fear PS Audio is unduly concerned about bass, as if its market research has indicated that it is a make or break feature. While I can applaud the Sub Out, I am reticent to suggest plaudits for the Bass Boost option. The difference between having it enabled and not was/is negligible if at all discernible.

Lastly is the inclusion of an Analog OUT as well as Analog IN. This is where I and PS Audio maintain a strong difference of opinion. PS Audio’s thinking is that at some point the PS Audio Sprout100 owner will be in the market for more power and might be thinking of adding a PS Audio power amplifier, which they can connect via the Analog OUT. I am not convinced of the notion that Sprout100 owners would see the device as a front-end to a bigger, more powerful system. I am much more inclined to believe that the youth market, namely the Millennials, would be more inclined to attach multiple components, i.e. game-box, Blu-ray player, cassette deck, etc.…  At first glance of the unit, connecting a more powerful, high-end amp was not even on my radar, not even a consideration.

The issues, concerns and differences of opinion are not game changers. While they do detract a bit, and prevent the Sprout100 from gaining a “clean sheet” in my book, it remains a truly worthwhile product.

The post PS Audio Sprout100 integrated amplifier Review appeared first on Dagogo.


PMI Belles Aria Preamplifier and Monoblock Amplifiers Review

$
0
0

It’s all about simplicity, and it is something audiophiles tend to forget. It seems the machinery of industry always wants to push a new feature, another aspect of operational complexity. Our cars are becoming technologically laden, far more so than computers of ten years ago. Phones are ubiquitous with the continual addition of functionality. Bluetooth invisibly conjoins mobile audio devices. Our homes are becoming “smart,” our children questionably so. Why, then, shouldn’t our components and systems for the home two-channel system also become more complex?

Some have, and a prime example is the previously reviewed Benchmark AHB2 Amplifier that has so much going on technologically that it takes a hefty Owner’s Manual to explain it all. In that review, I spent time comparing the straightforward operation of the amplifier under review here, the Power Modules Inc. Aria Monoblock, to the AHB2. While there is no shortage of configuration flexibility with the Benchmark Amp and it utilizes the new Class AAA operation developed jointly with George Lucas’s THX, it did not show itself superior in performance to the Aria when the latter was set up well.

The old adage that the best signal path is the shortest one still holds true, not just at the component level, but also potentially at the system level. In my experience it holds true in terms of power and signal cables (i.e. straight wire cables are better typically than networked or filtered cables), in terms of circuit layout in components, and in terms of simpler versus more complex products. Even when it comes to digital sources like Tidal, and music management software such as Roon, turning off features that purportedly enhance the listening experience, like up conversion of the signal or Roon’s Headroom adjustment, improves the sound of playback of files and streaming audio. (Please note the warnings in Roon associated with defeating the Headroom adjustment. You turn it off and play the system at unsafe listening levels at your own risk of damage to your ears and/or equipment.)

Aforementioned simplicity principle notwithstanding, there seems a movement away from simplicity toward preamps, DACs, Integrated and even power amps festooned with functionality – all requiring longer signal paths. By the time the average audiophile constructs his system the signal has to be pushed through a maze of circuits. Thankfully, there are still purists around, those who like less in the signal path. One of them is Dave Belles of Power Modules Inc. in Pittsford, NY, who has been making high quality, no gimmick audiophile pre and power products for decades.

Dave does not subscribe to the school of component design wherein the front panel is festooned with features that would be used seldom, if at all. The internals are arranged by necessary function, according to old school classic design. The secret sauce of the amp is the power supply. Dave tunes the power supplies in his amps for maximal musicality of the amplifier. I am not at liberty to discuss the particulars, but please trust me when I say that the power supply of an amp is a make or break element. Even upgraded outboard power supplies yield an easily discernible benefit to sources and DACs. A robust power supply and minimalist layout make the Aria a very desirable amplifier from a design perspective, and the quality shows in the sound it produces.

PMI Belles Arias Preamplifier

Like DAC, like preamp

Recently I had an opportunity to compare some high-minded, high bit rate and up-converting high-clock-frequency DACs to a simpler design, the BorderPatrol DAC SE (USB + SPDIF). This unobtrusive, well-built, streamlined NOS (Non Oversampling) DAC is the epitome of minimalist circuit design – if one can call a DAC’s topology minimalist. The simplicity is found in two essential areas encompassing two objectives, namely signal treatment and build. Rather than up convert the signal, which requires the application of algorithms, the signal is kept native at 16 bit/44.1 kHz. This allows for a simpler build eschewing devices such as opamps in the signal path. Consequently, the output of the BP DAC SE is directly from the DAC chip, which results in quite an improvement in cleanness and vibrancy over the up-converting DACs I have used.

On a thread at Audiogon.com the question was asked: what kind of car would your system be? I responded instinctively, the Ariel Atom, and in some iterations the V8 Nomad version. No prissy features, no sluggishness, just pure performance. The stripped down Ariel is a supercar that normal mortals can afford (well, at least some normal mortals). It is all about the simplest design that can accomplish the feat of extreme track or, in the case of the Nomad, off road driving.

My idea of extreme audiophile sound is not to put up a rig that lulls my ears. I’m not interested in very warm sound, sound that is “rounded” by the elimination of some definition. I want to hear everything, but in no way do I wish to hear it harshly. Continuing with the Nomad V8 illustration, I want to go off road at high speed, but to have such a capable vehicle that I don’t get shattered in the process of doing so. Similarly, I want a rig that is able to handle anything musically, and I do mean anything, even the ugliest, most tortuous music that demands extreme equipment to produce cleanly, yet without a hint of stridency or roughness not inherent to the recording.

Does that sound like an impossible request? Honestly, it is for all but a few systems. There are very, very few rigs at shows or in homes that can do so, perhaps 10% of all extant systems. I have been putting up hundreds of systems for more than 12 years and most of them can’t be said to have unlimited performance with perfect manners. If I can’t do so easily after assembling dozens of systems at the $50k-$100k mark, neither can you.

One thing is for sure, you will not be moving toward the most extreme performance rapidly by stuffing the signal path. It takes herculean efforts to recapture what is lost through plying the signal with additional processing and/or extra electronic components. Why we do this to ourselves is a testament to wishful thinking that the more complex something is, the better it must be. It’s simply not so in most cases.

For instance, my fancy refrigerator with water and ice dispenser went rogue one night when a plastic part in the dispenser failed, and it flooded not only our kitchen but also a portion of the downstairs, taking out some of the ceiling and flooring of the basement. The listening room was completely unaffected. That was the last time those fancy features will ever be used; they were disconnected. It has now become a very reliable refrigerator that makes ice cubes in trays and keeps food in a climate-controlled environment. Simpler, better. In the same way, consistently I can make an audio system sound superior by removing the preamp from the chain.

The post PMI Belles Aria Preamplifier and Monoblock Amplifiers Review appeared first on Dagogo.

COS Engineering D1 DAC + Pre-Amplifier Review

$
0
0

Three Taiwanese connoisseurs of sound decided they need to bring some of their perspectives to the world, so they started COS, which stands for “connoisseur of sound”. Evidently they wish anonymity, considering this is the extent of information given about them on the website: “COS Engineering, founded by three close friends serious about audio entertainment, is dedicated to developing gears [sic] of the digital era that render music listening a sheer pleasure. D1, COS Engineering’s first product, made its debut in 2014.”

You know a company is not fooling around when it tucks the electronics inside a cabinet constructed from aerospace grade aluminum alloy! Such a prestigious launch for a first product reminds me of Constellation’s components, the cabinets do have a similarity to them. The D1 exudes opulence I associate with very high-end gear. Other outstanding features of the D1 discussed on the company’s website include:

    • A proprietary algorithm with a linear-phase delay FIR filter up-samples data to 176.4K or 192K, processed by 3648 MMAC/sec DSP.
    • Data storage in a 1 second buffer prior to conversion, featuring a crystal oscillator with jitter of less than 1ps (1 picosecond) and dedicated re-clocking circuitry.
    • Dual toroid power transformers, one each for the digital circuit and the analog circuit to avoid possible interference.
    • Individual DAC circuit boards with high performance DAC chips, manually tuned and matched, running mono for each channel.
    • Volume control utilizing laddered high precision resistors and an array of analog switches, which are low in resistance, noise and distortion.


Unfamiliar names, unforgettable sound

The room at the audio show where I first encountered the COS Engineering Ltd. DAC 1 featured four companies so fresh that perhaps only one of them might twig in the mind of the average audiophile. Besides COS Engineering, there was Whammerdyne Heavy Industries, VERASTARR, and PureAudioProject. How many of those names do you know? Whammerdyne’s low power amplifiers I had only heard of in the past year. This Spring I finished a third review of the PureAudioProject Trio15 Horn 1 Speaker. VERASTARR cabling had been revealed to me in association with PureAudioProject. To most show goers, however, the room would have been mysterious.

I heard positive comments about the room from show attendees, but knowing the capabilities of the speakers intimately I thought the sound in the room was refined but not stirring when it came to macrodynamics. Given that the Whammerdyne The Ultimate Truth Amplifier was pushing only 4.2 watts RMS and peak output of 12.5 wpc, the sound was a bit underwhelming. When I tried to take the listening level up to assess the system in a more aggressive disposition, the outside limits of the amplification were readily apparent as the amp ran out of steam quickly. (4.2 watts would be thunderous to the Destination Audio Horns I’m reviewing. – pub.) I had the output of the COS DAC 1 pegged and the speakers were not showing the powerful grip on the bass that they are capable of producing. Yet, that did not prevent me from hearing the smooth subtleties of the digital source, the COS D1. So, when I received a call from Mike Powell, the U.S. Distributor for COS Engineering, to review the D1, I thought it good idea.

COS does not seem interested in pursuing a war of attrition against other manufacturers based on the highest bit depth and frequency rate. Up-conversion to 32 bit and double DSD has become commonplace. Nowadays, manufacturers need to explain why they would not do so. COS claims that a superior signal at 24bit/384kHz is more appealing than a higher degree of processing. One company that holds a similar perspective is Border Patrol Audio Electronics. Border Patrol’s design philosophy that guided the development of their DAC SE is that in bypassing up-conversion and sticking with an ultra short signal path, more of the integrity of signal is captured. My experience with that DAC convinced me that it is a legitimate design alternative, note that I did not say the only legitimate alternative. Though the DAC SE had less meat on the bones, it was more transparent than the laddered DACs on hand, the Benchmark DAC3 DX and the Eastern Electric Minimax DAC Supreme.


COS and Benchmark Media

Want to know what the difference between a studio quality and audiophile quality DAC sound is? The COS DAC 1 reveals it primarily as refinement. The arrival of the D1 allowed me to compare straight up a studio oriented DAC and an audiophile oriented DAC to see which one would offer perceptually the most impressive technical sound, and which would offer the most pleasing sound overall. One might think that the Benchmark DAC3 DX would be the favorite for presenting a sensation of precise performance while the COS D1 would perhaps be considered best for an overall sense of listenablility.

There is a problem, however, with that premise. Precision is typically extremely pleasing, as is evidenced in the ever-escalating resolution of video, as well as the high aesthetic quality of Apple products. The appearance of Apple products is refined to the extreme to make them seem simple, while they have state of the art complexity operationally. The Benchmark Audio DAC3 DX seems on its own to be terrifically refined; yet, when compared to the COS D1 it losses some luster. The D1 is not just a pretty box made with attention to aesthetics, but has ultra-refined sound quality, too.

While I am discussing the aesthetics of the D1 let’s observe the appearance and operations. The D1 appears as a slab of flat finished aluminum with a central, large cylinder, the VOLUME knob. A smiley face array of pinpoint white LEDs beneath indicate power On, Standby, Mute and listening level. Directly underneath the beveled lower edge is the eye for the remote.

In back are pairs of RCA and XLR analog outputs, as well as similar inputs. Digital inputs include two SPDIF Coaxial, two Optical TOSlink, and one USB. The D1 does not have an AES/EBU (XLR) input. Two switches controlling the BUF (Buffer) ON/OFF and USB 2.0/1.0 are above the USB port. The unit has a grounding post; the user must supply the wiring to ground the unit. At the 15A IEC connection along with the power switch is a user selectable Voltage switch.

The footers are screw-in solid polished spikes, and COS supplies what appears to be an acrylic or light metal square with a pit for each spike to protect surfaces from damage. When setting up the DAC, one nearly needs two people to put the protective squares underneath. Perhaps the best method is to leave the rear spike off entirely, attach the front two spikes and get the square protectors oriented underneath, then lift the unit to add the rear spike, and while still elevated, slide the last square protector underneath.

The unit is massively built, completely inert in feel, has dead-on perfect movement of the VOLUME knob, emits no noise, is impervious to movement from affixing heavy power cords and interconnects, is pure pleasure on the eyes in terms of the forgiving but completely clear LEDs in either dim or bright light. I don’t know if I have handled any other DAC that ticks off such a list of considerations and gets them all correct.

The post COS Engineering D1 DAC + Pre-Amplifier Review appeared first on Dagogo.

Spread Spectrum Technologies Thoebe II preamplifier and Son Of Ampzilla II stereo power amplifier Review

$
0
0

thoebe-soa2-CMYK

It is impossible to know from a name, or from how the founder of the company dresses for that matter, what a component will sound like. If one were to go by appearances only, the attire of James Bongiorno or the garish blue hue of his Ampzilla amplifier might be off-putting. James, now departed, was a vibrant individual who displayed that vibrancy in many ways. I recall seeing the Ampzilla at shows and I always wanted to review it, partly because of the sound it was making, and partly because of its looks!

It turned out the opportunity came to me when Constantine Soo, Publisher of Dagogo solicited the writers with the chance to review the components here presented. I was hesitant, though, and I will be honest about it; I noticed that Spread Spectrum Technologies, the company James Bongiorno started, was now in the hands of Wyred4Sound. I had sampled a Wyred4Sound amp previously in my room, but passed on it as a review candidate as it was not sufficiently enticing. I wondered if the mysterious Ampzilla II would capture my imagination beyond its name, so I took a chance on it.

It was a great move, as the Ampzilla II strikes my ear as radically different from the W4S amp I had used. I was pleased to see the thorough explanation contained on the “About” link at the SST homepage that EJ Sarmento, Wyred4Sound’s chief designer, is honoring the original design, retaining the larger schema but tweaking it, while toning down the blue color scheme to black. Thus far it seems the marriage of W4S and SST is working out.


Arrival and unpacking

The double boxed cartons with thick foam did the job protecting the Thoebe II and Son of Ampzilla II, and communication with Tony Holt of Wyred4Sound was timely and polite, a great customer service experience.

The components feature a flat, dull aluminum faceplate with matte gray cases. Gone is the vibrant, but somewhat off-putting garish blue color. The styling is understated, even generic along the lines of older NAD products. My first impression is of a subdued appearance, but thankfully without eyeball piercing LEDs. The stock feet are generously sized, so as to allow easy lifting, and the  weight is not prohibitive for most owners to handle alone.

These are the simple gear man’s delight, with throwback features such as BALANCE, BASS and TREBLE controls. I typically am disgruntled with contouring of the signal, but I found these controls deft and effective, liking the effect regardless of whatever potential degradation of the sound might occur from them being included.

The smallish remote looks better than most, but the nomenclature on the rear side of the components is far too small to be helpful. When a person has to peer over the side of a component at black lettering on a dark case using a flashlight, it is time to improve the experience.


Layout

The SST Thoebe II is a feature-rich preamp, having a collection of functions grouped in small touch buttons under a moderately sized display. Thankfully, bright green is used for the dimmable display, making it legible from a distance. To the left side of the display are two ¼” headphone outputs; the left one operates in conjunction with the speakers, but the right one mutes the Line function of the preamp while in use. To the far right is the VOLUME control knob. The other functions, duplicated on the adequately sized remote control, are from left to right STANDBY, INPUT UP or INPUT DOWN (Three pair unbalanced, one pair balanced), BASS, TREBLE, IR Sensor, BALANCE, PHASE, GAIN, DIM and MUTE.

The BASS and TREBLE controls adjust each from -5 to +5 in 1dB increments. Balance can be adjusted from +10L to +10R in 1dB increments. Phase is toggled between zero and 180 degrees, as is the Gain setting between High and Low.  The Phono stage requires an MM or high output MC cartridge, and it uses a new RIAA optimized topology. I only use file playback or streaming audio, so I will leave discussion of the Phono stage to others. The built-in DAC uses the ESS Sabre 9018 chip, has an Asynchronous, galvanically isolated USB input, and supports up to 32 bit 384kHz PCM and DSD4 and DSD128.

The backside of the unit is busy on the left side, with the optional Phono inputs above three sets of RCA inputs and one set of XLR. Fixed line level outputs occupy a black rectangle on the back plate alerting the owner to these potentially damaging outputs that are attenuated. A set of three RCA outputs and one set of XLR outputs follow. Above these are the Toslink, USB and Coaxial Inputs. Just off center of the back is a 12V Trigger output which when connected will turn on both the Thoebe II and Son of Ampzilla II. The 15A IEC sits off to the right with the power fuse compartment integral.


How about all those features?

In my room I have no need of balance control, as it is a perfect environment for listening. I did, however, test the Thoebe II’s BALANCE function and found it to shift the center image incrementally enough so as to allow for subtle manipulation. The indication of balance shifting is shown unusually by the display, but becomes intuitive quickly enough.

The BASS and TREBLE controls are the real stars of the user-friendly features of the Thoebe II. I found myself calling upon them whenever I set up a system with not quite enough top- or bottom-end. The value of an adjustable preamp with quality tonal controls can be enormous. If the audiophile does not wish to pursue adjustment of the system via cables, then the bass and treble controls are indispensable.

Any set of components and cables have an innate character, but when a new item is introduced into the system there is no telling precisely how and to what degree the sound quality will shift. One may be able to ball park the effect, but it may not be to full satisfaction. For instance, the Red Dragon S500 is a “cooler” sounding amplifier than the Son of Ampzilla II. If I were to construct the exact same system with the S500 I may deem the result too top-end emphasized. The Thoebe II’s treble control of only one or two steps down might bring a satisfactory lowering of the intensity on all music, not only particular tracks.

The BASS and TREBLE controls are readily available on the remote control, so I found that if a track was played with too heavy a bass footprint I could instantly lighten it; this is a very gratifying way to enjoy a piece of music at a higher level, but without the associated displeasure at the dynamic overload. Unlike tonal controls of the past, I found these to pose a very light burden on the signal, such that I did not mind the effect, and did not feel I was losing definition or detail for the sake of using it. This is one of the few tone controls I would use myself, and I did find myself taking advantage of it during the review without concerns for degradation of the sound. I like the combination of the cleanness of ESS Sabre chips in a DAC, yet having the configuration capacity of addressing any tonal issues.

The post Spread Spectrum Technologies Thoebe II preamplifier and Son Of Ampzilla II stereo power amplifier Review appeared first on Dagogo.

First Watt B1 Buffer Preamp and J2 Power JFET Amplifier Review

$
0
0

I wonder how many audiophiles get caught on the “power escalator,” by which I do not mean the one at the mall, but the one in the listening room. Did you know you have an escalator in your audio room? Sure you do, if you have over time found yourself seeking an ever more powerful amp which you believe will yield better sound. I admit I have a very tall, long escalator in my room, one that extends back ten years and reaches 1,000 Watts high! I rode that escalator many times between the 200-Watt and 1,000-Watt floors, but it has been several years since I rode it down to the basement, the sub-100-Watt floor. With the review of the First Watt J2 JFET Amplifier and B1 Buffer Amp, it is time to descend.

It seems most audiophiles enter the hobby already well upward from the bottom steps of power by using either a receiver with at least 100Wpc or separates at the same, or higher, specification. It did not take me long to settle on enjoyment of big power. Among several others, I have reviewed two powerful amps from Pass Labs, the Class A XA160.5, and the Class A/B X600.5. I must admit that for all the beauty of the XA160.5 I felt drawn to the X600.5 for the vastness of the soundstage, the macrodynamic impact and utter ease at higher listening levels. I concluded I could capture the finesse the XA160.5 displayed through manipulating other aspects of the system such as the DAC or cables. However, the attributes provided by the power structure of the X600.5 seemed impossible to duplicate with the lower-powered amp.

I have spent a fair bit of time, too, with Class D amps offering from 200 to 1,000Wpc, another flavor of big sound. To date, the Red Dragon S500 is my Class D amp of choice, and it has been a particularly peachy performer with sultry sound in many systems. Given these experiences, what could possibly enthrall about a (relatively) puny “25 Watter” by First Watt? That is what I seek to explain in this article, along with my impressions of the difference between big power and relatively low power, and the practical implications for someone going the lower-power route.

First Watt B1 Buffered Preamp

The B1 Buffer Preamp is described by First Watt as a minimalist line stage for controlling listening levels without editorializing on the source signal. It is a small, lightweight but well built, pressed all-aluminum box featuring a center toggle switch on the faceplate to select between two pair of RCA inputs, and twin attenuation controls for Left and Right channels. On the backside, the unit is powered by a supplied DC power cord; the unit remains powered up when plugged in, as there is no On/Off switch.  Along with the two sets of single-ended inputs is a pair of single-ended outputs. That’s it – no muss, no fuss!

The purpose of the B1 Buffer is to address impedance mismatches between a volume control and an amp. Nelson Pass explains in the Owner’s Manual:

“Is impedance matching an issue? Passive volume controls do have to make a trade-off between input impedance and output impedance. If the input impedance is high, making the input to the volume control easy for the source to drive, then the output impedance is also high, possibly creating difficulty with the input impedance of the power amplifier. And vice versa: If your amplifier prefers low source impedance, then your signal source might have to look at low impedance in the volume control.

This suggests the possibility of using a high quality buffer in conjunction with a volume control. A buffer is still an active circuit using tubes or transistors, but it has no voltage gain – it only interposes itself to make a low impedance into a high impedance, or vice versa.

If you put a buffer in front of a volume control, the control’s low impedance looks like high impedance. If you put a buffer after a volume control, it makes the output impedance much lower. You can put buffers before and after a volume control if you want.

The goal for the First Watt B1 was to make a solid state buffer that was very neutral, with very low distortion and noise, and very wide bandwidth without using negative feedback. It has no voltage gain; its sole purpose is to either increase or lower impedance.”


With First Watt, you don’t just get a component, you get a Nelson Pass commentary and tutorial all in one. The B1 and J2 Owner’s Manuals read more like shoptalk to designers than directions for owners. Nelson attempts to make it lively by inserting analogies to explain the effect of gain in a system, such as driving a car at 55mph in a vehicle where the engine is barely working versus a car in which the engine is running at top speed. Vehicle analogies come in handy when discussing audio systems, and I can relate to this one. Having used everything from SET amps to high-power Class D, my ears have heard the sonic equivalent of what Nelson is saying. His assertion is that with the proper speakers the lower-powered amp can be every bit as stimulating to the hearer as the higher-powered.

Staying with the automotive analogy, the question I will seek to answer is; does one obtain the full driving experience with lower power? Or, similar to a four cylinder car, does one hear a “strain” or lack of torque, so to speak, with a lower-powered amp? Conversely, does a higher-powered amp always ensure more ease, or shall we say, “sound performance”? The two camps, low power and high power, often do not compare directly technically as the technologies can be quite different – consider a SET amp versus a Class D amp. Yet, assuming there is no mismatch of the amp to speaker, the listening experience is the acid test for the hobbyist, and is the focus of this article.

The post First Watt B1 Buffer Preamp and J2 Power JFET Amplifier Review appeared first on Dagogo.

Emia Remote Autoformer Review

$
0
0

What if I told you the best linestage I have ever heard in my system wasn’t the $28,000 tube preamp I loved for so long or the incredible $38,000 transistor unit that I recently had in the house” If you have to have an active linestage, these two units are the best I have heard. If you can get by with a passive unit that is so plain looking that it’s almost invisible, then I can tell you the best linestage I have ever had in the house is the silver version of Emia Remote Autoformer. Truth is it’s not even close in my system.

Jeffrey Jackson and Dave Slagle created EMIA to fulfill the need for affordable high-end audio components using clever design and quality parts. On the Emia website it says, “Emia represents a way of thinking or a concept if you will, rather than a specific product. Our unique way of thinking blends the knowledge and experience of Jackson of Experience Music and Slagle of Intact Audio with the goal of integrating the subjective and the objective to further both the art and science of musical reproduction. While so many people today are simply trying to copy and bring a vintage technology to market, we strive to understand the underlying concepts and apply them to contemporary sound reproduction through the introduction of new designs.”

Jeffrey and Dave have chosen to use unassuming chassis design that puts the bling on the inside as Dave Slagle is fond of saying. Everything they make is hand-made in their workshops. Emia is not even close to being a mainstream high-end audio company. You have to place an order and most often wait for the product, but I promise you it is worth the wait.


Design

According to David, Emia’s goal in circuit design is to think outside the box and look at everything from vintage Western Electric parts to modern circuit boards. One of their primary design principles is their belief in using the best part for the job, and that they say, they couldn’t care less if that part is vintage, modern, inexpensive or expensive.

The Remote Autoformer provides control from +7dB to -53dB in 1 dB steps. You also get something I will no longer live without, the ability to balance the system between the left and right channels in 1 dB increments. It has three inputs and two outputs.

In a conversation with me, David jokingly said resistive attenuators were “so last century.” He feels that real systems use inductive volume controls and points out that they were good enough for Western Electric, and they are still the best. He maintains that he uses an inductive volume control that measures really well, is easy to install, and provides sufficiently fine volume steps. He said, “It makes much more technical sense to use an auto transformer for this application. Since there’s no need to isolate the primary and secondary windings, and both windings may be grounded, it is perfectly fine to combine the primary and secondary into a single winding. That’s exactly what McIntosh has been doing for decades with their output transformer based solid-state amplifiers.

When I asked him how the Emia units are different from other autoformers he has made before, he answered, “All of the autoformers I make have essentially the same character. The only thing that differs between them is the attenuation taper and switching methodology. This unit uses higher quality relays and a processor to accomplish a switching arrangement that provides -54dB to 0dB in 1dB steps. Beyond 0dB the unit seamless transitions to up to an additional +7dB of gain also in 1dB steps. The unit also allows remote input selection between the three inputs. Balance control is also done by remote in 1dB increments by automatically bumping one channel up or down by one step at a time, so no additional circuit is required.”

He then added, “To me, the two biggest features of this unit is the ability for remote balance control and the transition to gain only when needed. Other units allow a single 6dB switch that changes the entire character of the sound.” Speaking for myself, I find balance control a necessary function in order to get the ultimate enjoyment out of my system. So, I agree that the ability to fine tune the balance is really nice.

The post Emia Remote Autoformer Review appeared first on Dagogo.

Esoteric Grandioso C1 Line Stage Preamplifier and Grandioso M1 monoblocks Review

$
0
0

Emotion in a Silver Jewel Box

Many months ago I was asked about reviewing the Esoteric Grandioso C1 preamp and M1 monoblocks. I had just started to remodel my home, including the listening room, so the review had to wait. I was about 3 weeks away from being done with the project when Scott Sefton of Esoteric contacted me about bringing the pre and amps over to my home. As it turned out, there were some remodel items that still needed a few more weeks to finish (and, of course, months of additional tweaking), most notably redoing the electrical outlets. Nonetheless, I determined that I was ready to start doing reviews again.

A preliminary word about this review. When I finally completed the first draft it was two and one-half times longer than it is in this final version. As you will see, I liked these components so much that I found myself stretching to find something wrong with them. I literally wrote a page on whether they sounded great because they did something “wrong” in the musical reproduction. I finally realized that the added verbiage created the misleading impression that there was something about these wonderful products that I didn’t like, so in the end I took it all out. So don’t be deceived by the shortness of this review. I and others spent many hours debating where the C1 and M1 fit in the pantheon of top-tier audio components.


Esoteric Is The Right Word

I’ve been very familiar with Esoteric’s digital products, having owned several in the past. However, I wasn’t sure what to expect from their preamps and amps, other than what I’ve heard at audio shows. I guess I expected something very detailed and nuanced, and just a shade on the analytical side. Boy was I wrong. Yes, what I received was highly detailed and nuanced, but there is no way you can apply the “analytical” label to the C1 or the M1.

The C1 and M1 are big, heavy and strikingly beautiful. Of course, beauty is in the eye of the beholder, but I suspect that 95%+ of the audiophile population will agree that these components fall into the beautiful category. You will definitely want to display them, as they absolutely beg to be shown off. In addition, their weight and construction are such that aftermarket feet/points are unnecessary. Though I positioned the C1 on a heavy and solid equipment rack and the M1’s on heavy amp stands, I suspect I could have placed them on the floor or on a lesser rack and still gotten excellent results.

Esoteric Grandioso C1 Line Stage Preamplifier

The setup was straightforward, with the only unusual aspect being the fact that the C1, which is a two-piece preamp, consists of a DC power supply and a separate control unit. The preamp’s DC power supply is a true dual-mono device, but in a single enclosure that requires two separate power cords to feed dual AC inputs that in turn translate into DC outputs that feed the C1 control unit via two multi-pin umbilical cords. For those of you interested, the C1 DC power unit uses five hefty power transformers and features high-capacity reservoir capacitors and silicon carbide (SiC) Schottky barrier diodes.

Quoting from Esoteric’s website, the control unit “consists of two monoblock preamplifier modules and a logic control module. The input and output sections of each preamplifier module are constructed on separate boards, which are arranged one above the other in order to minimize the lengths of the signal paths. These modules are mounted on a unique leaf spring suspension system that was originally developed for Esoteric’s leading lineup of SACD players. Its floating design helps achieve total left and right channel independence.”

The M1 monoblocks are the proverbial iron fist in a silk glove, with 300 watts into 8 ohms, 600 into 4 ohms, and a serious maximum power output of 1200 watts into 2 ohms. They have 28dB of gain, and accommodate both XLR and RCA connectors.

The functions and controls of the C1 are intuitive and are a pleasure to operate, so there is no reason to spend any time here explaining their operation. Suffice it to say that everything works as expected without even the hint of a hiccup.

I did have an initial glitch with the C1/M1 combo. I discovered that the M1s are sensitive to DC offset, which is a new issue I experienced after my recent home remodeling. This is not the place for a full discussion of DC offset (in my case apparently caused by the wall switches installed as part of a new LED lighting system), but it can cause transformers to develop a mechanical hum, and high-power amps generally have big transformers. Some amps are more susceptible than others, and the M1 appears to be susceptible. However, I was easily able to address this issue with a great product – the Emotiva CMX-2 Precision AC Line Restoration & Common Mode Filter System. This product is very good, not very expensive, and does exactly what it says. It probably deserves its own review, and perhaps I’ll do that in the coming months. Suffice it to say that this product completely eliminated the issue, so I was able to proceed with the review without any transformer hum.

Initial Configuration

I first tested the C1/M1 combo in the following configuration: My Qsonix Q-205 server’s digital output fed a Legacy Audio Wavelet via a Stealth Audio V14-T digital cable (see my review in September 2016). The Wavelet’s analog outputs fed the Esoteric Grandioso C1 via a balanced Stealth Sakra V12, and the C1 connected to the M1’s via balanced Wireworld Platinum Eclipse 6’s. Speaker cables were Silent Source Silver Signature, and the speakers were Vivid Audio Giya G1.

For those of you unfamiliar, the Wavelet is a custom piece developed by Legacy Audio initially for its fabulous V speakers. It is a DAC, crossover, room correction and digital preamp in a single box. A review of this amazing component will follow, but you need to know that the Wavelet can be used in various ways, and I used it here as a DAC in all cases, but also with the room correction on and off, and incorporating or bypassing the digital preamp. In my initial configuration the Wavelet was used as a DAC and room correction device, with the C1 doing the preamp duties.

The post Esoteric Grandioso C1 Line Stage Preamplifier and Grandioso M1 monoblocks Review appeared first on Dagogo.

Audio Note M10 Signature Preamplifier Review

$
0
0

Audio Note M10 main chassis

Audio Note M10 Galahad Power Supply Unit

Arrival and Set-up

No matter how hard you try, receiving new gear is always problematic, particularly interfacing with the shipper. Some months ago, I contacted Audio Note (U.K.) about the possibility of getting an Audio Note M10 Signature for review. Later, I received an email from Audio Note (U.K.) that they had completed a review sample and that DHL was airfreighting it to Houston. Subsequently, I contacted DHL and requested that the delivery be postponed for the following Tuesday so that I could arrange to be at home. You probably already know where this is going (and you would be right). Monday afternoon, I received a frantic call from Audio Note that the packages were sitting on my front porch. “Could I drop everything and go home to check on them?” I managed to get home (with my remarkably patient granddaughter in tow) to find a total of five boxes on my doorstep, two of which seemed large enough to contain a sofa and two easy chairs. I rolled them in and took anti-inflammatories that night.

Neli Davis of Audio Federation arrived Friday evening to help with set-up. She suggested that we audition the existing preamp in the system (Einstein preamp + EMM Labs MTRX amps) to get an idea of the system’s sound. As sometimes happens with good listening, we did not turn in until 3 a.m.

You might wonder how much set-up a preamp requires. Isn’t it “plug and play”? In the case of the Audio Note M10 Signature, the answer would be a resounding “No.” The preamp consists of two massive 60lb power supplies, each the size of a large tube amplifier, plus the preamp control section and the myriad of power cords and umbilicals necessary to connect everything. Given the size and complexity of all of this, the question of where to site everything becomes an issue as well. In any event, three hours later it was finally time to turn everything back on and start the warm-up and break-in process. Within about an hour, the sound began to settle in (though I sensed that more break-in was in store). The only nit was that the stepped attenuator on the preamp coupled with the high gain of the EMM Labs MTRX amps basically meant that the range of volume adjustment was distinctly narrower than ideal.


The Technology

My erstwhile publisher, Constantine Soo, previously discussed in detail the technological innovations that have made this product possible. Please see his excellent article “Audio Note UK launches the flagship preamplifier, the M10 Line Signature,” Dagogo, March 2013.


An Interlude

At this juncture, Neli and I both needed a break. The Houston Audio Society had scheduled a Christmas party for that evening and I wanted to introduce Neli around to some of my friends. We finally returned home about 9:00 p.m. with several of these listening buddies in tow. At this point, the system had been playing for about six hours and the sound was noticeably more refined. In particular, intelligibility of voices was superb; depth and three-dimensionality were improved over the Einstein and, according to Neli, would get significantly better with further break-in. I attend two, sometimes three, live classical concerts a month and the recreation of depth and three-dimensionality have always been key to my enjoyment of reproduced sound. Tonality and accurate recreation of timbre are also paramount. We had another very late evening.
The Next Day

I had not really planned on making any further changes to the system configuration; however, Neli really wanted to hear the Audio Note M10 Signature in conjunction with my Audio Note Balanced Kegon amplifiers. Moving the 230# EMM MTRX amps in and out of the system is not a task undertaken lightly, but my friend and fellow audiophile Paul Jackson was in from London – and being a strapping youth of 40, hoisted the EMMs as if they were featherweights. Not surprisingly, the combination of the two Audio Note components was a very synergistic match and continued to sound better and better the longer that we listened.

At some point, we inserted Finite Elemente Cerabases under the preamp and its two power supply boxes, which rather significantly improved the sound in all the ways that one might expect. After Neli left, I spent the remainder of the evening listening. Even at this early point in my evaluation, it was clear that there was something very special about the sound of the Audio Note M10 Signature, particularly when used in conjunction with the companion Audio Note Balanced Kegon amplifiers driving the Acapella Audio Arts Triolon Exalibur speaker system.

Audio Note M10 Signature main chassis rear interior

Audio Note M10 Signature main chassis interior

Audio Note M10 Signature Galahad PSU rear

Audio Note M10 Signature Galahad PSU interior

Break-in

I allowed at least a hundred hours of break-in before doing serious listening, though we did do some listening during that process. While avoiding extended commentary, I would just note that the M10 during break-in sounded, for the most part, as one might expect: the bass as manifested by the Acapella speakers was not fully filled-in and the treble via the ion tweeters at times seemed under-defined (especially when listening to cymbals). The overall sound could at times be just a bit “hard,” which surprised me, but which seemed to disappear over time.

A few comments about the sound at this point follow. These comments are based on listening to digital media through the EMM TX2 Transport and DA2 Processor, as my turntable was temporarily out of commission while awaiting a new compressor.

ORG did an SACD reissue of Jeff Buckley’s first album, Grace, in addition to a 45 reissue. The SACD was mastered by Bernie Grundman. We noted over a couple of listening sessions that transients were powerful, Buckley’s voice well-centered and palpable, and the drums clearly placed, loud and tight (almost too much so, but some of that may be the recording). The mastering seemed a bit bright on my system, but this SACD has sounded bright elsewhere. (One of our number was of the view that the mastering sounded typical for Grundman, and that what I might call “bright” sounded good to him.) Guitars are captured about as cleanly as I have ever heard, with excellent layering – and there are a lot of guitars tracked in. Indeed, this album is very busy in general and represents an enormous amount of work on the part of Buckley and his production and engineering team. To its credit, the Audio Note M10 seemed to be able to separate out the complex, overlapping threads of musical dialogue in an intelligible and easily distinguishable manner that made for rewarding listening.

On a CD of Strauss’s Four Last Songs (RCA, Eschenbach, Houston Symphony), the Audio Note brought out the unique tone and texture of Renee Fleming’s voice. She was louder than the orchestra and not well blended – although this was surely an issue of microphones and engineering. The orchestra was rich but this RCA re-issue, from relatively early in the digital days, is not particularly warm.

One of the most rewarding experiences for a trio of us listeners was hearing a recent live recording of the Martinu 4th Symphony with Belohlavek conducting the BBC Symphony (Onyx 4061), a piece two of us had never heard. Not only was it a joy to discover this music, but it also became clear during multiple listens over multiple days that the M10 Signature was now fully broken in and had developed a beguiling depth and three-dimensionality. The thing that was so satisfying about hearing this music through the M10 as opposed to the Einstein was that the top to bottom coherence was remarkably seamless. The musical lines are very active and cover the whole range of the orchestra. The “handoffs” between winds and strings, between cellos and violins, top to bottom of the range, was effortless. Complex musical lines were easily followed throughout the thickly orchestrated symphony and made clear sense to the ears. Put another way, when the music interwove many different threads, it was easier to pick out a particular thread and follow it than I have typically experienced. The retrieval of extra detail in the bass was superb – the cellos and basses chugged and thumped along powerfully without in any way becoming overbearing. The combination of a lowered noise floor and added resolution of low level detail significantly increased the amount of ambient information coming through. Recreation of the reverberation of the bass drum in the hall, bass slam, and palpability were all excellent.

The post Audio Note M10 Signature Preamplifier Review appeared first on Dagogo.


Merrill Audio releases PURE Tape Head Preamplifier for Reel to Reel Tape Decks

$
0
0

Merrill Audio is releasing a tape head preamplifier for reel to reel tape decks, dubbed PURE.

On July 13, 2019, Xtreme Fidelity in River Vale, NJ will host a demonstration of the Merrill Audio PURE on an Ampex ATR tape deck that is fully restored by ATR Services. There will be a comparison of the PURE against the Ampex native cards. Request information for limited invitations at XtremeFidelity.net.

According to the press release, “[the] Merrill Audio PURE Tape Head Preamp provides a superior Tape Head Preamp that brings out the full dynamics of Reel to Reel Tape, with the details and immediacy of the live recording.”

“Merrill Audio Pure Tape Head Preamp is the 1st of series of 3 Tape head Preamps. The Merrill Audio PURE Tape head preamp will feature the purity of the sound from Reel to Reel tape with minimal adjustments and is focused on the Purist Audiophile demanding the most accurate sound signature with the least amount of artifacts.  Price at $9,000,  it is an ideal addition to the Ampex ATR 100, 102 and 104 series. Merrill Audio can provide the plug in card to access the Tape Head directly on the Ampex ATR 100 series Machines, replacing the onboard preamp cards.

The Merrill Audio PURE Tape Head Preamp takes its designed cues from the famed Jens Phono stage and circuit designer, Jens Waale. The Merrill Audio PURE Tape Head Preamp has 6 speed and eq settings 3.75 NAB, 7.5 NAB, 15 NAB, 7.5 IEC, 15 IEC and 30 IEC2. The gain is selectable at 71db of 65db. All settings are saved. The display brightness can be dimmed, delayed dimmed or delay blanked. All setting and speed/eq settings can be set using a remote. The Eq and gain settings can also be manually switched.  The low noise Merrill Audio Kratos External Power Supply provide the 1st level of power filtering.

The Merrill Audio ELEMENT PURE Tape Head Preamp is built with ultra-tight tolerance components, Silver plated Teflon sleeved wire, fully balanced inputs and outputs, custom XLR connectors with gold plated pins with Teflon body in metal housing is used. The external power supply is ultra-low noise power supply gives the Merrill Audio PURE Tape Head Preamp an ultra-low noise floor with great immediacy in reproduction.”

Now at select dealers and direct from Merrill Audio.

More information at www.MerrillAudio.net/tape-head-preamplifier/

The post Merrill Audio releases PURE Tape Head Preamplifier for Reel to Reel Tape Decks appeared first on Dagogo.

Wells Audio Commander Preamplifier Review

$
0
0

Years after selling them, I still wonder occasionally how could I have divested my pair of Wells Audio Innamorata amplifiers. At the time it seemed necessary, as I was making a purchase of some speakers. Over time, as I continue to review components, I recall how many gorgeous systems I made with those amps, and I find it hard to avoid self-recrimination.

It came as no surprise, then, that when Jeff Wells contacted me in order to fulfill a years-old promise, he had my attention. Confidentially he had shared with me at the time I was reviewing the amps that a tube preamplifier was on the table. I asked to be the first to have a crack at it. Jeff kept his word and this is the premier review of the Commander Preamplifier from Wells Audio.

Commander – what a great name for a preamplifier, the control unit! You command it, and it commands the system. As a matter of humor I keep an Emerson Jumbo Universal Remote, the kind that is about 1 foot long with .5” square buttons and sold at drug stores for the sight impaired, in my listening room. Every so often I grab it, usually when some unsuspecting visitor is seated next to me, and I wave it at the system, “I have complete control! I have all audiophile power with this remote!” Anachronistic “VCR” and “TV-VCR” buttons on the remote add to the ludicrous nature of the moment. The expression on the visitor is priceless as they try to suppress guffaws! At times we can take ourselves a bit too seriously, and a bit of humor lightens up the experience.

While there are no truly universal remote controls, we do recognize command performances, or people with commanding personalities. In terms of audio components, I find the Wells Audio Commander to be uncharacteristically capable in what it does. It is a preamp that makes music listening exciting, as it enlivens amplifiers more than any tube preamplifier previously encountered. I will share more about that in a bit as I discuss the sound.


Design and construction

Wells Audio products are by intent not bespoke components, not bling machines. There is no rubidium in the preamp, nor is it paneled with Bubinga wood, or fitted with an obnoxiously sized volume dial. Of course, you won’t be charged for them, and that is the point. The case is smoked acrylic and the “meter” is an arrestingly cool “Magic Eye” tube that changes appearance with the listening level. Costs for the shell are constrained, but not the internal parts. If you either have to show off your bespoke preamp, or think that sound quality is contingent on starting with a 100 pound block of aluminum as opposed to the circuitry making the sound, then a Wells Commander may not be for you. I have no problem at all with the Wells philosophy. Why? Because I have handled other inexpensively housed electronics that performed admirably.

The aesthetics of the Commander are appealing to me, with the mirror-like black case and the silver ringed sky blue LED pushbuttons. A full complement of inputs and outputs of both XLR and RCA allow flexibility in connections. See the website for a more thorough examination of particulars (http://www.wellsaudio.com/commander).

The most eye-catching feature is the Magic Eye that winks at you as the level is adjusted, and it proves as nice a vanity feature and every bit as cool as Pass Labs meters. Nearly as novel is the flashing, clicking power button that sounds like a turn signal in a car as the unit warms up. A point of information here; I am currently reviewing the Sanders Magtech Mono Amplifiers and the advice given by Sanders is that five seconds is enough to wait to turn on the amps following powering up the preamplifier. Not in the case of preamps like the Commander, which have longer startup times. Five seconds may be the rule generally, but when you are firing up an amp with 1,600 Watts per channel into 8 Ohms, you want to make sure the preamp is good and ready.

There is a care and handling consideration in that you best not manhandle the Commander, and you must take caution if you remove the lid to insert tubes or change them. This is not a tough-as-nails product; there is a give to the chassis when weight is put on it. Do not lean hard on the top or put pressure on the front face of the Commander. Thankfully, the unit is under 20 pounds, so it can be carried held away from the body without pressure on the chassis. The longer piece of acrylic glass across the front of the unit has the function buttons embedded into it. When a button is depressed there is a slight give to the Plexiglas. At first this is unnerving, but as with other unusual features, such as the clacking of a resistive ladder volume control, one adjusts to it and after a short period of time it is scarcely considered, especially if the remote control is used regularly.

The signal and output tubes, as well as the Magic Eye, are shipped along with the Commander in a thick, dense foam cradle. The double box and foam adequately protect the unit, and there was no damage to the Level 1 Commander. The owner removes the cover and inserts the tubes. The minute screws of the cover can strip, and the plastic can scratch, chip or break. This is most definitely not a toss it around type of component, but rather a “handle with kid gloves” piece.

The other complaint I have with the Commander is the lack of clear designation of functions on the remote control. Several times I looked for “Aux1”, the primary input I used, only to find it is not seen on the remote. It seems the functions are a combination of multiple and single touch commands. This should be made more intuitive.

The overall build of the Commander reminds me of another product that I adore, the Kingsound King III Electrostatic Speakers. It is one of those oh-so-rare products that combines a thrifty combination of construction with a killer design for the signal path — and enthralling sound. I have had opportunity to compare the King III to some very stiff competition in open panel designs, and the King III still reigns in my room. This speaker is so good that recently there was a pair for sale online for $5K. I already own a set, but the thought of buying the second pair as backup crossed my mind more than once. I would lament if the speaker ever died on me, so I am sure to check connections three times when setting it up and I do not overdrive it. It is so good that I want it to last theoretically forever. If you get that line of reasoning, wanting to preserve the performance of a component or speakers you love so much, then apply that kind of passion to the Commander Preamplifier. It’s that kind of component.

Having previously reviewed the Wells Akasha and Innamorata amplifiers, and now the Commander Tube Preamplifier, I agree with Jeff Wells’ declaration that his components eschew fancy packaging in favor of fancy designs and parts selection. Wells Audio is a company that is trying to give the enthusiast a component that performs at a high level without the sky-high price tag. Looking inside the unit one sees upper grade parts and a clean, smart layout. I have always been one who could accept a component that is well designed and sounds great, even if the case is economical. I have learned over the years to prioritize power supply and signal path over nearly every other parameter, and that principle has served me well; it also serves Wells Audio customers well.

The post Wells Audio Commander Preamplifier Review appeared first on Dagogo.

Luxman launches new flagship control amplifier CL-1000

$
0
0

BALLSTON SPA, New York, October 2, 2019 –Luxman’s new flagship control amplifier, theCL-1000 is the spiritual heir to the legendary C-1000, launched in 1975. Yet even as it salutes the past, the new preamp looks forward with an all-new LECUTA volume control system, a nanocrystal core transformer, Luxman’s proprietary oil-impregnated capacitors and more. “The CL-1000 represents everything Luxman knows about vacuum tube audio,” said Jeff Sigmund, president of Luxman America. “It’s not just our newest preamp, it’s our new benchmark.”

The CL-1000 complements the Luxman MQ-300 tube stereo power amplifier and will be available later this month at a suggested retail price of $19,995.


NEW LECUTA TRANSFORMER-ASSISTED VOLUME CONTROL

The heart of any preamplifier is the volume control. If not executed properly, it can cause left/right channel imbalances and introduce subtle but tangible distortions at low volume. For this reason, Luxman created the highly regarded LECUA attenuator system. The CL-1000 refines that concept with LECUTA, the Luxman Electronically Controlled Ultimate Transformer Attenuator.

The Volume knob is a 34-step rotary switch that triggers 34 relays, located completely outside the signal path. In turn, the relays activate 34 taps on matching left and right transformers. These transformer taps set the volume in carefully calibrated steps. Because transformer cores can influence sound quality, Luxman engineers selected FineMet® core material from Hitachi Metals, Ltd. This has a unique nanocrystal structure for high saturation flux density, high relative permeability and low core loss. As a result, the CL-1000 delivers uncompromising sound, even at low volume.


METICULOUS CIRCUIT DESIGN

While some are rediscovering the magic of vacuum tubes, Luxman has been making tube audio components without interruption since the company’s earliest days. The CL-1000 embodies this expertise, complete with refinements to take vacuum tube audio a major step forward.

  • Super Permalloy input transformer. Because transformers can have a profound impact on vacuum tube audio quality. Luxman chose an input transformer with a high-permeability Super Permalloy core.
  • Six JJ Electronic E88CC dual triodes. The CL-1000 uses two-stage PK NF amplification, with both the attenuator driver and the output stage built with vacuum tubes from JJ Electronic. Luxman selected E88CC dual triodes for superb reliability, low noise, attractive dynamics and a densely detailed midrange.
  • Custom capacitors. Luxman couples the two stages with the company’s own, oil-impregnated capacitors. Originally developed for the MQ-300 amplifier, these help deliver satisfying music reproduction with superb current handling.
  • Left/right Super Permalloy output transformers. The output stage features the sonic benefits of Super Permalloy cores in independent left and right transformers.
  • Articulator function. Luxman’s deep experience with signal path transformers has revealed one downside: residual magnetic fields in the cores. For this reason, the CL-1000 oscillates and demagnetizes the transformer cores every time the owner turns on the power. For an even higher degree of sonic purity, users can perform manual demagnetization with the Articulator switch.
  • Versatile MM/MC phono preamp. The CL-1000 accommodates both Moving Magnet and Moving Coil cartridges with an audiophile-grade phono preamplifier. Six-position switches on the rear panel enable users to optimize impedance and capacitance.
  • Robust, stable power supply. To deliver the most demanding musical peaks without effort or strain, the CL-1000 power supply features large, independent left and right transformers and high-grade filter capacitors.


ROBUST CHASSIS

External vibration is the enemy of vacuum tube audio reproduction. Under the surface, the CL-1000 chassis takes advantage of a comprehensive engineering program to fight even subtle distortions caused by air-borne or shelf-borne vibration.

  • Triple-layer aluminum front panel. Reminiscent of Luxman’s classic C-1000, the front panel uses precision machining to unite three thick layers into one massive, anti-resonant assembly.
  • Natural walnut cabinet with rosewood gloss finish. Additional protection from resonance comes from the elegant cabinet, which is covered in walnut.
  • Cast iron isolator feet. Massive iron feet feature a density gradient to block and diffuse shelf-borne vibration.
  • Rigid box chassis. The chassis itself forms an anti-resonant container with internal partitions helping to reduce vibration further.
  • Internal rubber dampers. For added protection, Luxman isolated the circuit boards from the main chassis with special rubber dampers.
  • Alloy input and output terminals. The RCA input and output jacks consist of an alloy that combines the conductivity of copper with the durability of brass.
  • Gold-plated AC input. The AC input contacts are treated with non-magnetic nickel and plated with gold.


ABOUT LUXMAN

Luxman America, based in Ballston Spa, NY, is a subsidiary of Luxman Corporation of Yokohama, Japan. Luxman was among the world’s first consumer electronics companies, founded at the dawn of the radio age in 1925. Over the years, Luxman audio components have become synonymous with timeless styling, exquisite fit and finish, and above all, uncompromising sound quality. When the audio industry moved en masse into transistor amplifiers, Luxman continued to create vacuum tube amplifiers without interruption. Landmark products include the SQ-5A vacuum tube integrated amplifier (1961), the PD-300 turntable with vacuum disc stabilizer (1980) and the DU-10 universal disc player for CD, SACD and DVD Audio (2001). For additional information, we invite you to visit luxman.com and Like us on Facebook.

The post Luxman launches new flagship control amplifier CL-1000 appeared first on Dagogo.

Merrill Audio announces MASTER Tape Head Preamplifier for Reel to Reel Tape Decks

$
0
0

BERNARDSVILLE, New Jersey, USA – Merrill Audio is very excited to announce a large upgrade from the previous Tape Head Preamplifier, the newly released MASTER Tape Head Preamp is studio quality reproduction of your Master Tapes. Quiet, dynamic and realistic presentation of your master tapes can now be heard to an uncanny degree of realism with the MASTER Tape Head Preamp from Merrill Audio. Additional features include VU Meters for calibration, High Frequency Level Adjustments, output level control, channel balance and VU Meter level adjustment. Finally, there is a Studio Quality Tape Head Preamplifier for the purist of Reel to Reel Tape playback. Merrill Audio, known for Musical Immediacy and ultra-low noise floor, is very excited to introduce the MASTER Tape Head Preamplifier for the Audio Purist when nothing but only the best will do.

Merrill Audio MASTER Tape Head Preamp is the 2nd of a series of exquisite Tape Head Preamplifiers recently introduced. Price at $15,000, it is an ideal addition to the Ampex ATR 100, 102 and 104 series or the Otari MTR desks. Merrill Audio can provide the plug in card to access the Tape Head directly on the Ampex ATR 100 series Machines, replacing the onboard preamp cards for an order increase in performance. The maximum gain on the Merrill Audio Master Tape Head Preamp is set to 71dB, and has an adjustable output level from 0dB to 71dB. There are 6 Speed and Equalization settings provided which are 3.75ips/NAB, 7.5 IPS/NAB, 7.5 IPS/IEC, 15IPS/NAB, 15IPS/IEC and 30IPS/AES. Easy settings are done from the Capacitive Color 5inch touch screen from the front panel touch screen. The configuration is saved to memory which are restored on power up. The Merrill Audio MASTER Tape Head Preamplifier will accept Tape outputs from 0.3mV to 6mV and has a maximum peak to peak output range of 24 volts, allowing for superb dynamics.

The Merrill Audio MASTER Tape Head Preamplifier comes in a work of art chassis, Rose Gold Front, black chassis with a full color, 5inch, Capacitive touch screen TFT display for easy reading and configuration.

The Merrill Audio MASTER Tape Head Preamplifier is built with ultra-tight tolerance components, Silver plated Teflon sleeved wire, fully balanced inputs and outputs, custom Merrill Audio XLR connectors with gold plated pins with Teflon body in metal housing is used. The KRATOS II external power supply is ultra-low noise power supply gives the Merrill Audio MASTER Tape Head Preamplifier an ultra-low noise floor with great immediacy in reproduction. Currently Shipping.

Specifications:

EQ available 3.75 IPS NAB
7.5 IPS NAB
7.5 IPS IEC
15 IPS NAB
15 IPS IEC
30 IPS IEC2
Channel Balance 0dB to 71dB selectable in 1024 increments
Color Touch Screen 480×800 TFT Capacitive Touch Screen, 5” screen
S/N Better than 110dB
Gain 71dB, with  level control from 0dB to 71dB output selectable in 1024 settings
Input Balanced
Output Balanced
Output Impedance 50 ohms
Maximum output voltage 24 volts
External power supply Standard
Dual Mono design
Display configurable for brightness Delayed dim or off.
Footers Isoacoustics GAIA III
Dimensions Dual Mono PURE Tape Head Preamp, 430mm (17”) x 400mm (16”) x 110mm (4.4”) without footers. 430mm (17”) x 400mm (16”) x 150mm (5.9”) with footers
External Kratos II Power Supply, 153mm (6”) x 88mm (3.5) x 310mm ( 12.2” )


Now at select dealers and direct from Merrill Audio.

More information at https://merrillaudio.net/master-tape-head-preamp/


The post Merrill Audio announces MASTER Tape Head Preamplifier for Reel to Reel Tape Decks appeared first on Dagogo.

Tri-Art Audio Series B System Review

$
0
0

Tri-Art B Series Open 5 open-baffle speaker

Cage match

Budget audio is like a cage match, with manufacturers pitted against each other in a battle to be declared the best value in audio. Two perennial loudspeaker contenders are Vandersteen and Magnepan, and for the sound quality each presents, they deservedly reap their share of customers. The principles at each company must breathe a sigh of relief that their designs are so different, lest they engage in an even more painful battle.

Imagine a professional fight in which a power lifter (Vandersteen) and a CrossFit champ (Magnepan) are going at it, when another contestant enters the ring. This one is a hipster (Tri-Art Audio). In the punishing contest for dominance, which one will emerge victorious? You guessed it, the hipster! Not possible? There’s no way that the Tri-Art Audio 5 Open Speaker can compete against a mid-level Vandy or Maggie? That conclusion would be wrong, and the reason why is because the disarming environmentalist design of the Tri-Art 5 Open masks a few brilliant technological advantages, including:

  1. Open Baffle (OB) to eliminate box resonances
  2. Twin 15” drivers for stress-free bass with extension
  3. Full range 8” for superior cleanness and center imaging
  4. Attenuation of full range driver to manage bass output

Those other companies have their virtues as well, as must be conceded, and many customers love the combination of virtues they offer. But neither Vandersteen nor Magnepan offer anything like the combination of virtues seen in the 5 Open, and that combination of virtues is every bit as compelling, perhaps more so.

There is a set of characteristics produced by an open baffle dynamic speaker that is not attainable by either box speakers or non-dynamic panels. Note that I did not say difficult to obtain, but unobtainable. A typical dynamic speaker will not avoid box colorations. A panel design, be it magnetic or electrostatic (unless hybrid), will not yield the drive and capacity to load a room like a dynamic speaker. Neither group has the image focus and density of a full range primary driver. Here, then, is the sum of the characteristics of an OB: power and frequency structure similar to a dynamic speaker, scale and openness similar to a panel speaker, and coherence and imaging similar to a speaker based around a full-range driver.

Let’s see what this hipster open baffle speaker can do!


Hipster Hifi

Who puts a GAIN switch on a power bar with a tube? That was just one of the many questions that peppered my mind as I surveyed the Tri-Art Audio Series B audio system. Others followed, including why put GAIN switches also on the preamp and amp? Why use separate power supplies for a passive preamp and a Class D amp? The biggest question of all was, why bamboo?

I first encountered the exotic, extraordinary Tri-Art Audio system on the last day of AXPONA 2019. I had things to do pertaining to finalizing items sought for review. I was moving along quickly when I glanced into the Tri-Art Audio room and saw the sizable 5 Open Speakers. Their form looked unusual. I scanned them in a second, noting they were open baffle speakers – wait! Is that bamboo? I honed in on the sound. Not bad! Within an hour I was finalizing a plan to review several components and the speakers. It did not take long at all to realize that this was an outlier, as I said in the one-line description of it in my 2019 AXPONA show report: “Freakishly, outlandishly capable! (From what I’ve heard) Top 3 of show.” Having lived with this system, which Tri-Art describes as a full range speaker with assistance in bass and treble, for a few months, I confirm that I was on target with that initial assessment. This review period has strengthened my impressions and deepened my respect for this quirky bamboo system. Tri-Art Audio is a manufacturer that has seemingly come out of nowhere to enter the fray that is affordable HiFi.

Not exquisite materials (doing my part to save the planet)

A surge of magnanimity courses over me each time I turn on the Tri-Art system. With its passive Pre-Amplifier, Class D Amplifier, Power Bar and other bamboo-based products, an owner of this equipment is helping to save the environment! Well, perhaps not saving it, but depleting it at a slower rate. When it comes to bamboo as a raw material, discussion of depletion rate hardly applies. A plant that can grow up to 1 foot per day and has a replenishment rate of 5 years versus 25-30 years for a hardwood is not in much danger of depletion. God put bamboo here so that when humans in their stupidity have ravaged the forests, there will still be a good, renewable, wood replacement resource to work with (I’m only half joking).

Sixteen years ago, when my wife and I were disappointed to find that the bedrooms and living room of the older home we thought had oak floors and particle board underneath the carpet, we considered installing bamboo flooring, but it was a tad too pricey. Given that a majority of speaker cabinets are made of an MDF derivative, it is both an aesthetic and economic boon to see a speaker utilizing bamboo. I have always been amazed that a plant so tasty as a sprout is agreeable for flooring, or speaker baffles, in maturity.

Historically, I have paid little attention to calls for energy efficient audio electronics, primarily since I have compared several Class D amps over the past decade and found them wanting sonically. I do not leave any equipment running, as I have proven to myself that warm up (except for some tube equipment) is essentially a waste of energy and time. I’m not terribly interested in products that have obscene manufacturing demands, nor ones with exotic materials. My ears tell me that whatever such materials are supposed to add to the performance of the product, usually it is not enough to sway my judgment of their performance holistically. I don’t recall ever thinking, “Wow, this speaker sounds so good because of the [insert material, e.g., aluminum, x-material, composite or MDF] cabinet!” Likewise, a great number of larger, more demanding to build speakers are not terribly impressive. This system from Tri-Art drives home the fact that it is first and foremost the genre of speaker, then circuitry, wiring and drivers, not the fanciness of the chassis or cabinet materials that overwhelmingly determines the sound quality.

Tri-Art Audio likely has a difference of opinion with me on this point. As Steve is known to say, “Bamboo was chosen first and foremost for its sound properties… It is a very fast material, has an incredible isolation to both airborne and structural vibrations… imparts a warm, natural contribution to the music that is missing in today’s digital world. I like to call it Mother Nature’s Carbon Fibre, speed without the dryness to the sound.” Having reviewed the Wilson Benesch Curve speaker, which has a carbon fiber cabinet, I did not find that speaker to be dry, but to my ears had plenty of warmth. My assessment of what works best in the 5 Open would have more to do with the fact that it is an open baffle with an attenuated full range driver, versus the fact that the baffle is made from bamboo. Regardless, it is a great choice for a contemporary and warm appearing speaker, and if the bamboo does add some acoustic warmth, more power to Tri-Art.

Over the decades I am beginning to lean toward the conclusion that a noisy cabinet is a detriment rather than an aid to a speaker. I find my attention steadily being drawn to panel and dipole speakers. Of the past five speakers I have owned, only one is a dynamic speaker with full cabinet, the Vapor Audio Joule White, and that is because it exhibits less of the hindrances of cabinets than most dynamic speakers. The appeal of the open baffle speaker to my ears has steadfastly grown over the decades.

The open baffle design of the 5 Open, and the “internals” of the Preamplifier and Amplifier are the thing with this system. Some people at Tri-Art know their craft when it comes to topology of components and selection of parts. That knowledge is spread across three lines of components, uninspiringly named the “S Series” for the beginner audiophile, the “P Series” for the audiophile moving up, and the “B Series” as the current ultimate expression of Tri-Art design.

Here is the first shocker in this article, regarding the little Tri-Art B Series 60-Watt Amplifier: I have used more powerful Class D amps but have not used any more luxurious sounding, including the previously owned Red Dragon S500 Amplifier. Such things contribute to the cognitive dissonance experienced when approaching Tri-Art products. Upon spying them, the audiophile is tempted to dismiss them as a niche product for people who are seeking a sustainable Earth and who are clueless as to HiFi sound. I’m happy I did not prejudge the company and the components in such a fashion.

B Series 60W Amp (bottom), Pre-Amp (top)

Unorthodox build, exotic sound

To that end some of the seeming strangeness of the Tri-Art philosophy of component creation comes to the fore. On the company’s website particular aspects of build are highlighted, among them the use of sheep’s wool to dampen the internal space of the components. While that is unusual, it is not a crazy idea; wool is considered a fine option for dampening walls in construction of dedicated rooms for audio and HT. Also, if one makes a lighter component, some form of dampening material is a good idea, even if an ecological material.

Things get curious in the Elements section of the website, under the subheading Sonic Purity. There is a short discussion of what is entitled “Naked Components” with the following description:

“All electronic components on our circuit boards have had their outer skin (plastic shrink identifying wrapping) removed. And for good reason: we discovered during our listening tests that stripping away plastic wrapping removes the sonic characteristics plastic brings to the electronic component.

We remove as much associated materials as possible that have negative sonic signatures.”

There are certain things in audio that I scoff at, such as seashells in a jar or a plastic clock to be placed strategically atop a component. Brass bowls and dishes I leave to the desperate or chintzy, and I declare them to be fundamentally off-base in system building. You will not find me spending my money on dots and spots, bowls and baubles to stick around the room, nor devices to slip onto cables. I don’t have patience for insipid, uninspiring changes. My initial reaction to stripping plastic from internal devices is, “whatever”. I have heard enough materials in dielectric, speaker cones, and cabinets that I do not subscribe to an audiophile version of Phrenology, that whatever material is used imparts an overriding sonic signature to the component. For this reason, I respectfully pass on spending time with the provided Tri-Art Bamboo Cable Stands and Tri-Art Iso-Feet, which are composed of Sorbothane half circles held by bamboo cups and are to be placed under components. Should Tri-Art leave the system with me for a while yet, if I have time I can experiment, but my time is best spent assembling another system, not placing footers.

Steve and the team at Tri-Art may be disheartened to see that I am eschewing what they likely consider a critical part of their system. I suspect they will be disappointed that I did not fully implement every part of the chain. Here is where manufacturer and reviewer principles and expectations part company. Some reviewers would gush over the more trinket-like elements of the system, and from my experience that would be poor reporting. It would present the tangential aspects of the system as though they were determinant. I prefer to give a solid assessment of the elements that touch the power and signal paths, as these are universally important. If a system can’t get it done in terms of the primary elements of audio, it doesn’t matter how many or what kind of footers are used. I am judging Tri-Art’s core competency here, the creation of speakers and components, and I leave the peripherals to other reviewers.

When it comes to alternative methods of making components, I do not care if Tri-Art Audio soaked the internals of the Preamplifier and Amplifier in lemon juice, painted them with a DARPA anti-radar coating, or stripped the plastic from them. I care about how the component performs relative to its price. When I reviewed the Wells Audio Innamorata Amplifier, I was appraised that as part of the upgrade over the Akasha Amplifier it contained Bybee products, which have been questioned as to their complexion and efficacy. My simple assessment was that as this was not the only upgrade to the Innamorata, and the amplifier performed at a clearly higher level than the Akasha, it was worth the additional price.

That is how I assess the stripping of plastic from internal parts of the Tri-Art Audio components. Then again, I have been asking myself how in the world do they get this amazing sound quality from such seemingly inexpensive components?

“All our B-Series boards are uniquely designed and assembled by Tri-Art in house,” offered Steve, “we are using many unique design characteristics and high-end parts. For example, Tri-Art branded multilayer board with positive and negative isolated on their own layer and grounds on separate layers – four layers in total, very thick boards. Great attention in the board design was taken to keep impedance consistent 47ohms throughout the traces of the board with no hard corners to the traces. The passive design is a shunt volume using a motorized Alps Blue Velvet shunted through custom valued naked Vishay resisters.  All signals are sent through custom pair of “GE” inspired balanced transformers providing pseudo balance through the RCA outputs and true balanced output through the DIN. All switching and loading settings are using best quality Elma switches.  Also unique to our design is the use of super tweeters off the headphone amplifier section of the board for conditioning the internal box (or room) for an improved environment for the electronics.

As you can see anything but stock in its design. Our amps are also very unique to their design.”

How utterly unexpected! I do not know that I have handled gear at this lower price point with so many high-end methods and parts. This revelation explains much of the surprising sound quality I hear from Tri-Art components.

Interior – B Series 60W Amp

The post Tri-Art Audio Series B System Review appeared first on Dagogo.

Viewing all 46 articles
Browse latest View live